Subscribe to the Quilt Blocks Digest newsletter for updates, special offers & exclusive content!
- Home
- Other Quilt Blocks
- Crazy
Crazy Quilt Block Tutorial
For an easy crazy quilt block with no stress stitch the block with scraps using improv quilting. The result has modern scrappy appeal!
Scrap lovers rejoice! Dig through your overflowing, slightly (or very) disorganized, messy, but oh so lovingly coveted scrap pile and pullout any 3 inch or larger size scrap that suits your fancy.
In other words almost anything goes with this crazy block! :-)
Scraps of Any Shape or Kind
Use larger scraps of any shape, length or color - perfect or imperfectly cut squares, rectangles, strips, left overs from pieced blocks, triangles, etc.
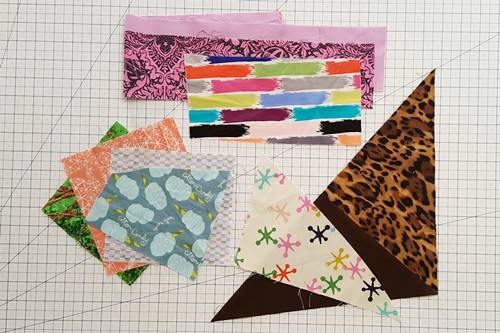 An assortment of scraps to construct a crazy quilt block.
Note: In general, the larger your block size the larger your scrap pieces should be. And vice a versa, for smaller block sizes use smaller scraps.
Crazy Quilt Block Instructions
Step 1 To begin, decide the size block you want. (I'm going for a 10 inch finished size, 10 1/2 inch unfinished block.)
Start with a scrap that is about 3 to 5 inches in size. Place it right side up on a cutting mat.
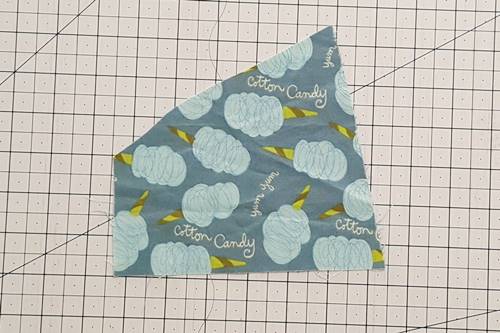
Step 2 Select a another (second) scrap piece. Decide which side of the prior (first) scrap you want to stitch it to.
Ensure that this next piece is long enough to go beyond the edges of the prior scrap piece and has a straight edge. If it doesn't have a straight edge, trim one side straight before stitching it to the entire fabric unit or single piece of scrap.
Stitch the two pieces together with a 1/4 inch seam.
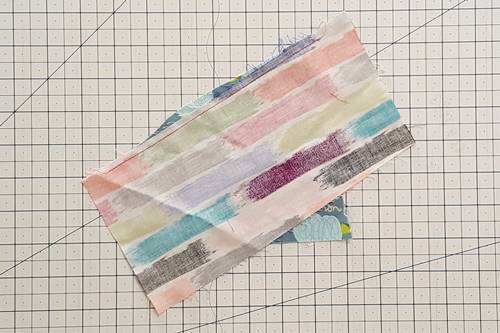
If you are concerned about sewing a straight seam, trim the two raw edges straight first (as shown in the next step).
Step 3 Use a rotary cutter to trim the seam/excess fabric by placing the lengthwise 1/4 inch measurement line of a quilting ruler along the seam line.
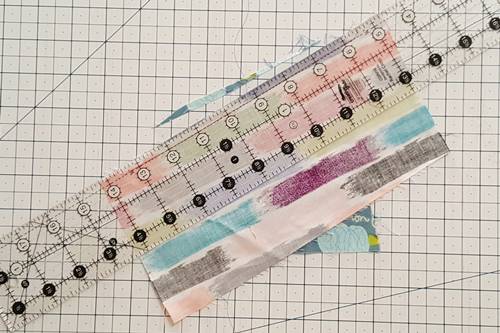
Step 4 Fold back the piece just stitched right side up and finger press the seam towards it (the fabric piece that was just stitched to the starting piece). Using a quilting ruler trim one side of the unit straight.
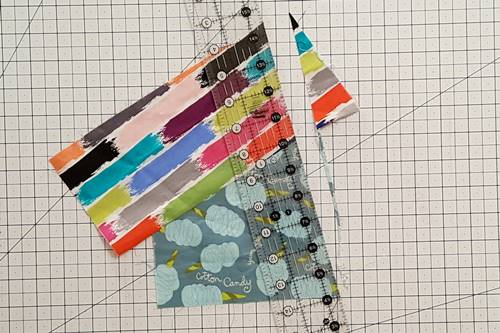
Step 5 Select another scrap piece that is long enough to go beyond the edge of the side you just cut straight.
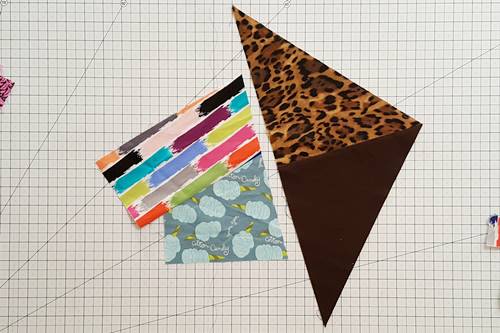
Step 6 With right sides together stitch a 1/4 inch seam. Fold back the piece just stitched right side up and finger press the seam towards it.
Use a quilting ruler to trim one side of the unit straight.
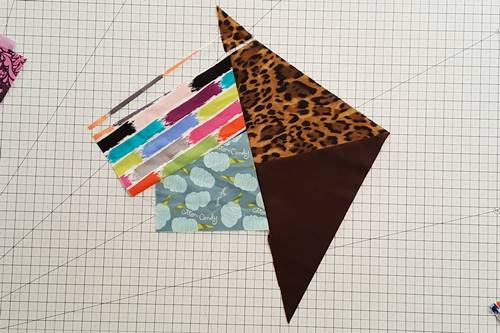
Step 7 Repeat steps 2 to 4 to add fabric pieces to the main unit so that when it's large enough the fabric unit will accommodate a square being cut from it (see Step 11a). So try not to assemble a rectangle.
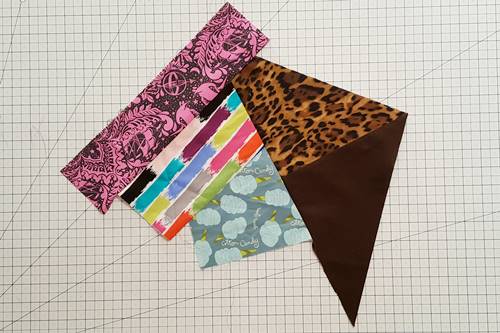
Step 8 As the fabric unit grows in size you may need to add a long fabric piece to the main unit. Do this by stitching a number of fabric scraps together to get the needed length. Stitch the pieces together with straight or angled seams.
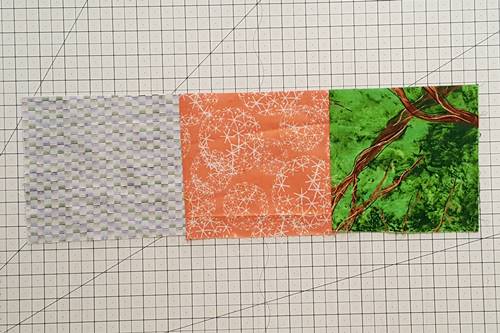
Step 9 Choose a side and stitch the new long unit to the main unit using a 1/4 inch seam. Trim the seam.
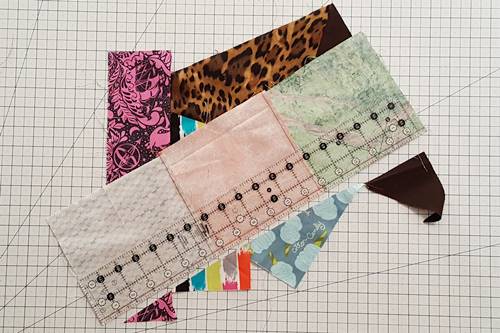
Step 10 Fold back the new unit right side up and finger press the seam towards it.
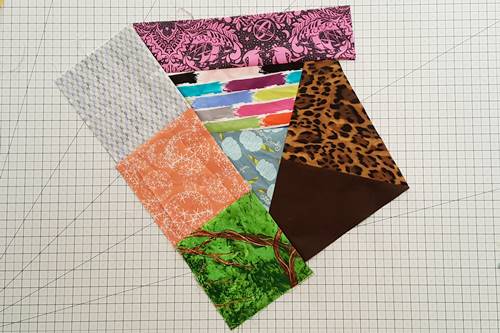
Step 11a When you believe the unit is large enough to accommodate your block size, situate a square ruler (I used a 10 1/2 inch) on the unit to prepare for cutting the block from it.
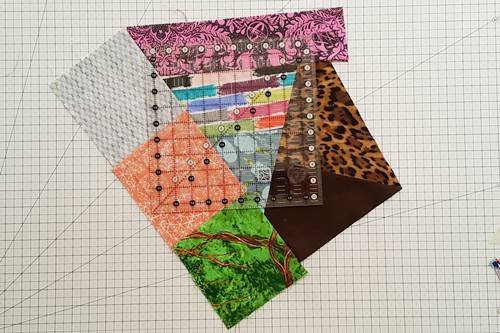
Step 11b Try positioning the ruler in different areas of the fabric unit to see which you like best.
Keep seams in mind. You want to account for seam allowance. Position the ruler so that its edges extend at least one half to three-quarter inches beyond any seam.
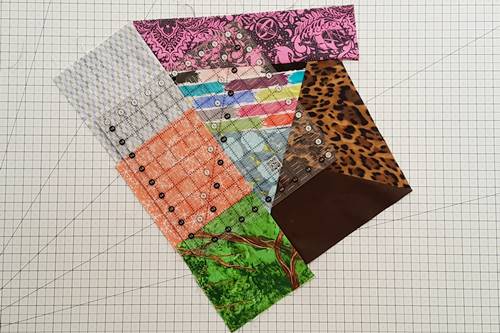
Step 12 When you are satisfied with the ruler placement, cut the fabric unit on all 4 sides of the ruler, leaving a square crazy quilt block.
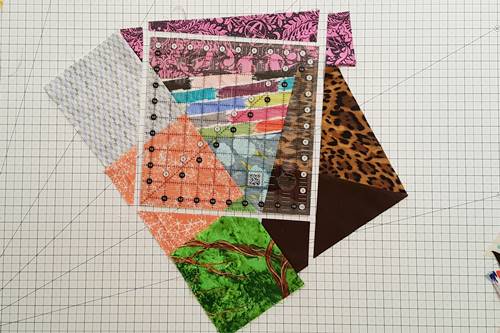
Spray the unfinished quilt block with a starch alternative to keep any bias edges from stretching when the block is used in a quilt.
Use the cutaway leftover scraps in another block or project.
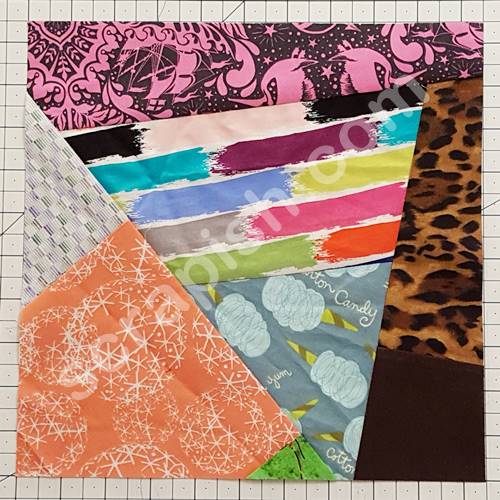
Finished Crazy Quilt Block
The finished crazy quilt block...now how easy and crazy was that?! :-)
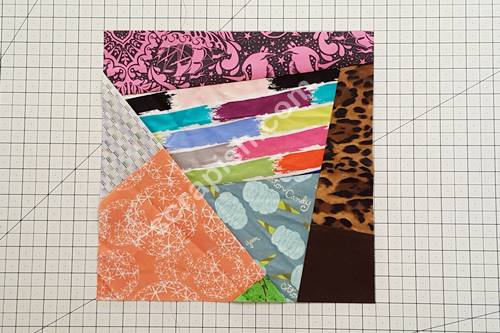
Modern Crazy Scrappy Quilt Pattern
Using scraps make 72 (10 inch) blocks for a crazy scrappy quilt that finishes about 80 inches x 90 inches. Stitch 8 blocks per row and 9 rows.
You'll need about a 3/4 yard of fabric for binding, 5 1/4 yards for the back and one package of queen-size batting.
And, the best part is you will rarely have to match a seam for the easiest crazy quilt ever! Sweet!!!
And that makes this crazy quilt block extra easy for beginners.
Subscribe to the Quilt Blocks Digest newsletter for updates, special offers & exclusive content!
You will receive an email asking you to confirm your consent to subscribe. You must click on the confirmation link contained in that email in order to be subscribed and receive emails.
Your email address is never shared. Unsubscribe any time.
