Subscribe to the Quilt Blocks Digest newsletter for updates, special offers & exclusive content!
- Home
- Other Quilt Blocks
- Orange Peel
Orange Peel Quilt Block Pattern Tutorial
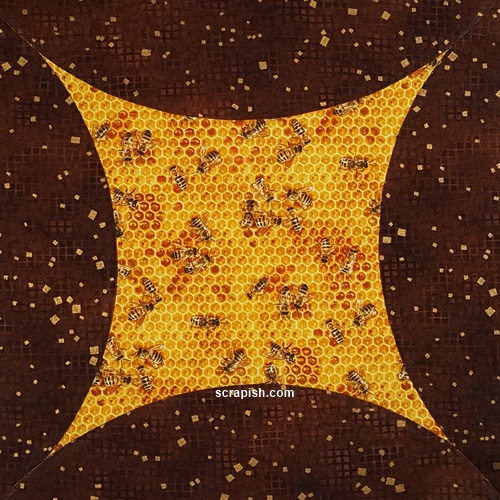
See how to make an orange peel quilt block using only the center piece of a double wedding ring template.
The Orange Peel Block Is So Much More
This quilting adventure started with me wanting to make a glorified 9 patch quilt block. I have many quilting templates, but not this one. So of course I tried to find one online and did, but it finished at 9 inches. I wanted to make a 12 inch block.
The template for the glorified 9 patch looks a lot like parts of a double wedding ring quilt template. So I pulled out one of those quilting templates.
Sure enough it had everything I needed.
But, I wondered if I could make it with just the background piece. Mainly, because I did not want to sew as many curves as the glorified 9 patch block requires. Lo and behold I
discovered the orange peel quilt block. And, another - an easy faux cathedral window quilt block.
After a few hours of hard thinking and a little playing around this tutorial is what I came up with. I like it because the crescents, or melons, turned out larger and give the background pieces more room to show off. And, there are fewer curves to stitch!
Double Wedding Ring Templates
I used the background piece of the Creative Grids (R) Double Wedding Ring (DWR) template, which is based on a 12 inch square.
Some DWR templates come with the large melon shape used to make the orange peel and the glorified 9 patch blocks, and some don't. The Creative Grids (R) DWR template does not.
This tutorial shows how you can still make either block without the large melon template piece.
During those hours of hard thinking I did figure out how to make the glorified 9 patch block using just the background template piece and will do a separate tutorial. I wanted to do the orange peel block first because it's simpler to make, and to practice sewing curves. Making it this way is easy!
Fabric Requirements
I began by cutting roughly a 15 inch square from fat quarters. Then, moved to cutting 1 (15 inch x WOF) strip from a number of different fabrics and subcut 2 (15 inch) squares from each strip to make orange peel blocks.
After it's made, I trim the orange peel quilt block to 12 1/2 inches (12 inch finished size) square.
Orange Peel Quilt Block Instructions
WOF= Width Of Fabric
Unless otherwise noted seams are 1/4 inch.
Step 1 Cut 2 (15 inch) squares from two different fabrics and place one on top of the other, either side up. I usually pair a light and a dark fabric.

Step 2 Fold the squares in half horizontally and press on the fold to create registration marks.
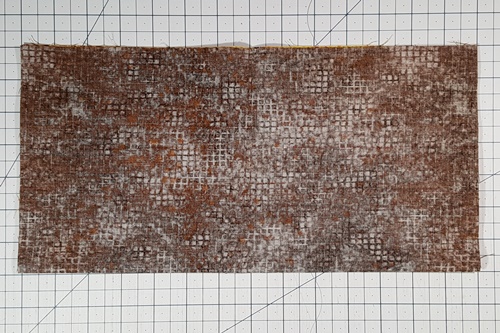
Step 3 Next, fold the squares in half vertically and press on the fold to create registration marks.

Step 4 Unfold the squares to reveal pressed in registration marks in the center of all four sides.
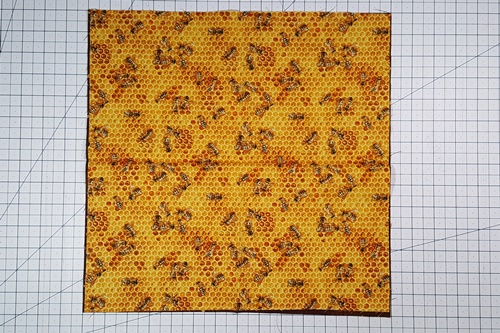
Step 5 Place and center the squares on a rotating cutting mat (or make sure you can move your original cutting mat). Center the background piece from a double wedding ring template on the squares using the pressed in registration marks as your guide.

Orange Peel Quilt Block: Cutting the Half Melons
Step 6 Use a rotary cutter to cut along each side of the template piece and off the edge of the fabric, keeping angle of the template.
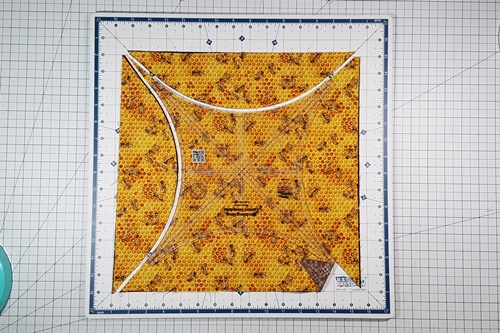
Step 7 Begin the cut by placing the rotary cutter next to a bottom blunt tip and cut backwards off the edge of the fabric.
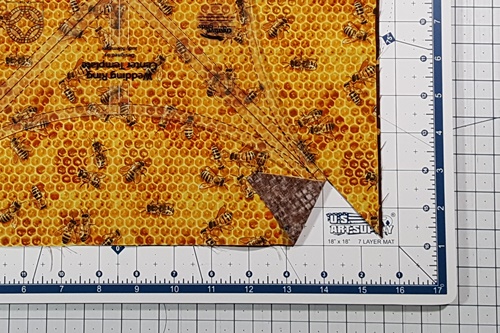
Step 8 Then cut slowly around the curve and then quickly past the top blunt tip and off the edge of the fabric, keeping the same angle.
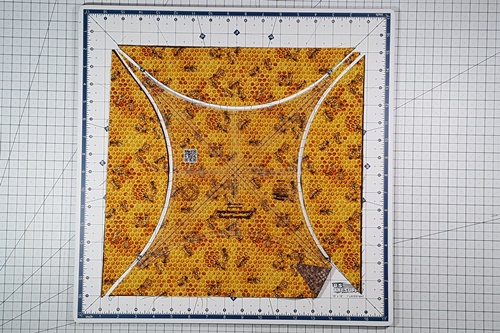
Step 9 Repeat Steps 6 - 8 to cut along all four sides of the template piece to cut out the crescents, or half melons.
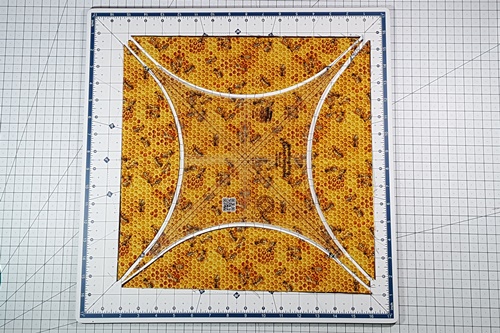
Step 10 Set aside the half melon shapes. Use a rotary cutter and cut along the blunt tip edges to remove the unnecessary fabric tips.

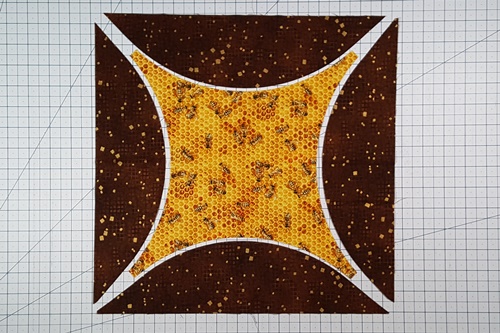
Step 11 Place the background piece from one square and the half melons from the second square onto your cutting mat as shown in the photo below.
Orange Peel Quilt Block: Pinning and Stitching
Step 12 With right sides together and a half melon on top, match the center pressed in registration mark of a top half melon with the registration mark on the background piece and pin. Pin the two pieces together along the entire length of the half melon.
Ease (or gently stretch) the background piece to match the curve of the half melon. Do not stretch the half melon.
Repeat for the bottom half melon.
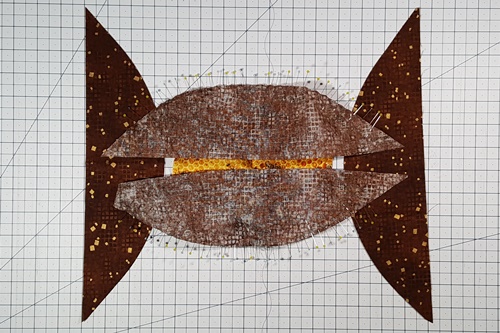
You can use fewer pins, pinning about every half inch. Or, you can pin only the first half (starting at the center and going back to the tip) of the melon, stitch to the center and then use your fingers to bring together the edges of the background and the half melon as you slowly stitch the rest of the seam.
Step 13 Here's how the pinning looks from the background side. You can see that the background has been stretched to match the curve of the half melons.
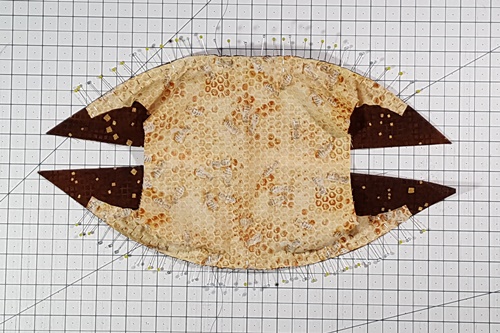
Step 14 With the half melon on top, stitch a 1/4 inch seam. Remove the pins as the needle gets to it. Try not to stitch over the pin.
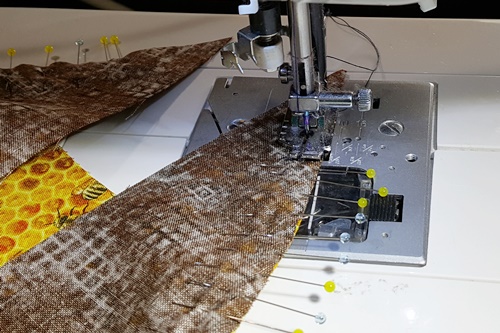
Step 15 Place two fingers on the fabric - one to the side and one in front of the presser foot to help guide the fabric and keep a 1/4 inch seam allowance.
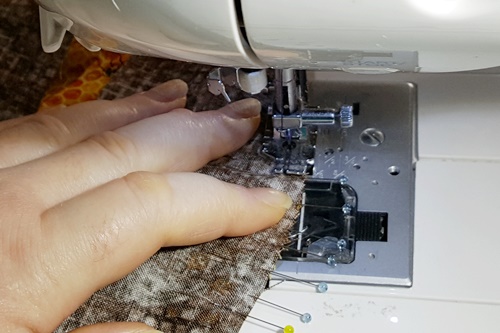
Step 16 From the wrong side of the fabric here's how the background piece and first two half melons look after stitching. See, no puckers in the seam. You can do it!
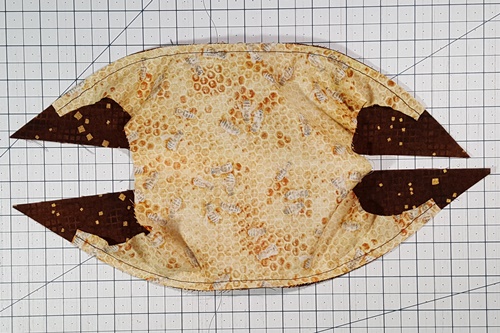
Step 17 Press the seams toward the half melons.
From the right side of the fabric here's how the background piece and first two half melons look after stitching. Your orange peel quilt block is almost finished
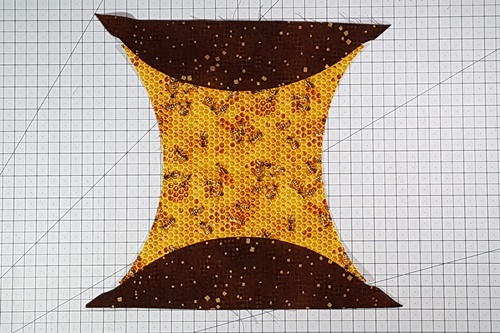
Step 18 Repeat Step 12 to pin the right and left half melons to the background.
Repeat steps 14 and 15 to stitch.
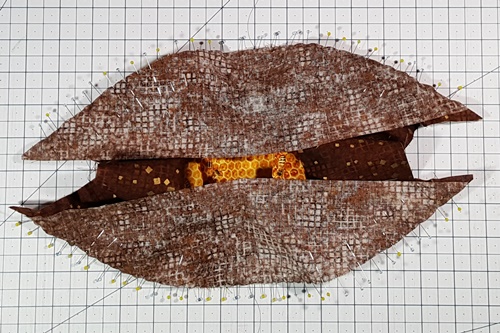
Step 19 From the back side here's how the completely stitched block looks. The stitching intersects in the points as you stitch the ends of the two half melons together.
Press the seams toward the half melons. Lightly spray a pressing alternative over the entire block and press from the back and front. This helps the block to lie flat.
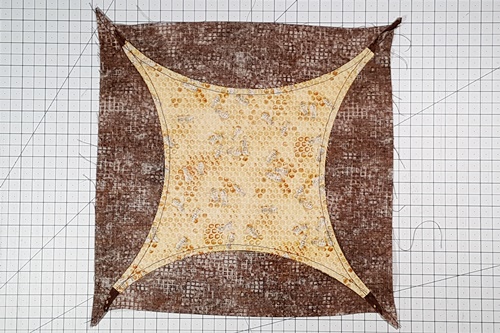
Step 20 Trim the orange peel quilt block to size. I trimmed it to 12 1/2 inches, about 1 inch past each point, for a 12 inch finished size. If you can still see the registration marks use them to center the ruler over the block.
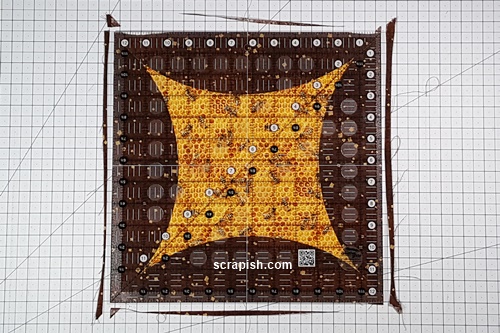
If you want the points to actually 'kiss', trim 1/4 inch past the points. The unfinished block will be about 11 1/2 inches, or 11 inches finished. Your quilt will also resemble a Cathedral windows quilt without all the work.
How to Stitch Using One Pin
There is a way to stitch this orange peel quilt block without all the pins. Use one pin to at each center. Here's how:
With the background on the bottom and the half melon on top, use one pin to pin the center of each together.
Start stitching from the center to the edge, matching the raw edges as you go using your fingers and/or awl. Gently stretch the background piece to match the curve of the half melon.
Now, go back and finish stitching the seam from the center, overlapping the previous 1/4 of stitching, to the other edge. This time with the background piece on top and the half melon on the bottom.
If you already know how to stitch curves this won't be a problem. But, if you're new to curves, pinning is the way to go until you get some practice under your belt. :-)
Your orange peel quilt block is finished! Now, that wasn't as bad as you thought it would be. Sewing curves is easy! :-)
Scrappy Orange Peel Quilt Pattern
Here's a look at how the orange peel quilt blocks will come together in a quilt. They will make a scrappy orange peel quilt pattern. I love them! Now, I just need to make more blocks. :-)
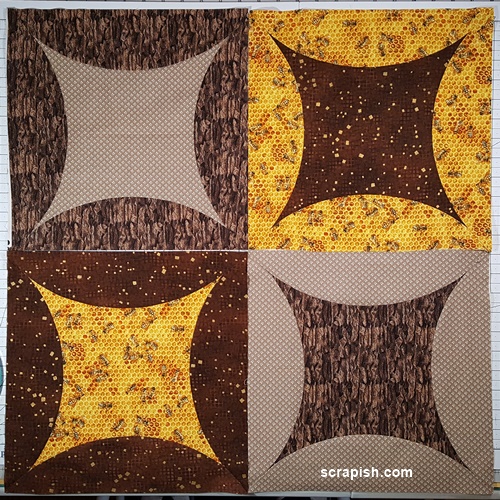
Scrappy Orange Peel Quilt Pattern Sizes
Together the blocks make a scrappy orange peel quilt pattern so no overall yardage is given but here are the number of blocks needed for a particular quilt size:
- Baby: 12 Blocks, 3 x 4 Rows, 36 x 48 inches
- Twin: 30 blocks, 4 x 6 rows, 48 x 72 inches
- Queen: 56 blocks, 7 x 8 rows, 84 x 96 inches
- King: 64 blocks, 8 x 8 rows, 96 x 96 inches
Doing this tutorial gave me lots of practice stitching gentle curves.Turns out they are not as hard to stitch as we think.
For more quilt blocks, check out our quilt block patterns library.
Subscribe to the Quilt Blocks Digest newsletter for updates, special offers & exclusive content!
You will receive an email asking you to confirm your consent to subscribe. You must click on the confirmation link contained in that email in order to be subscribed and receive emails.
Your email address is never shared. Unsubscribe any time.
