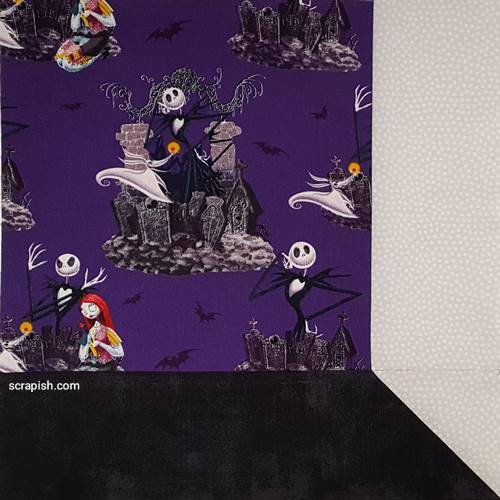
Subscribe to the Quilt Blocks Digest newsletter for updates, special offers & exclusive content!
- Home
- Other Quilt Blocks
- Attic Window
Attic Window Quilt Block Pattern Tutorial
Beginners, make an attic window quilt block with no Y seam. It's easy! Use it to frame fussy cuts from theme fabrics like Halloween and Christmas or quilt panels.
Stitch and Flip Quilting Technique
Some call this block the attic windows quilt block. It is a very old block that is traditionally made using a Y seam to connect the three pieces – window (the large square in these instructions), side strip, bottom strip (sill) – that make up the block.
But, I promised that this would be an easy attic window block to make. To do that we will fake the Y seam by using the tried and true stitch and flip quilting trick (er, I mean technique). :-)
If you're not already familiar with it, see step by step instructions of the stitch and flip quilting technique before continuing.
Attic Window Block Size Cutting Chart
|
8 Inch Finished Size |
12 Inch Finished Size |
|
Fabric A (large square/window)
Fabric B (side strip)
Fabric C (bottom sill)
|
Fabric A (large square/window)
Fabric B (side strip)
Fabric C (bottom sill)
|
|
8 Inch Finished Size (small window / extra wide shadow) Fabric A (window)
Fabric B (side strip)
Fabric C (bottom sill)
|
Attic Window Quilt Block Instructions
WOF= Width Of Fabric
Unless otherwise noted seams are 1/4 inch.
These instructions demonstrate a right facing/oriented attic window quilt block.
Want a left facing/oriented block? See the notes for what to do in Steps 4 and 6.
The other steps are the same regardless of orientation of the side strip/45 degree seam.
Step 1 Cut the fabric pieces according to the Block Size Cutting Chart from scraps or strips.
Here, I demonstrate the 12 inch size block and show you how to fussy cut the large (9 1/2 inch) square, or window portion of the block.
Fussy Cutting: To fussy cut a square, place a square quilting ruler on a piece of fabric that is long and wide enough to accommodate the size needed square
Choose the area/design on the fabric to fussy cut and center the ruler over it.
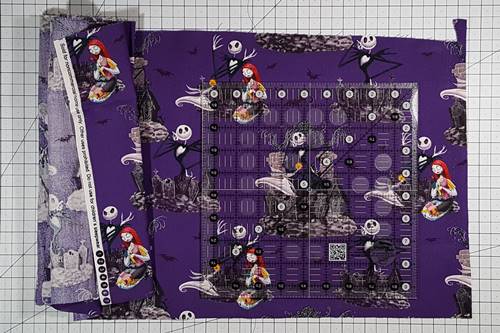
Step 2 Use a rotary cutter to cut along the edges of the quilting ruler, leaving the fussy cut square.
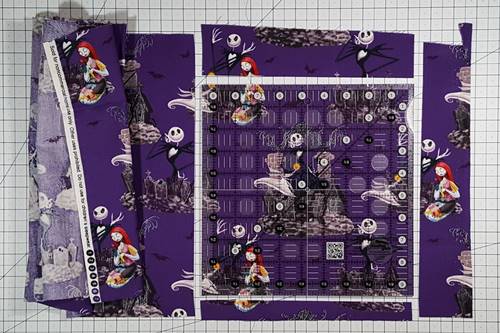
Step 3 The large square (window) is shown with the design centered/fussy cut.

Step 4 Make Faux Y Seam. On the wrong side of the small square, draw a diagonal line from the left corner to right corner.
With right sides together, align the square on the right-hand side of the bottom strip so that it faces like a \ (backslash). Stitch a seam on the drawn line.
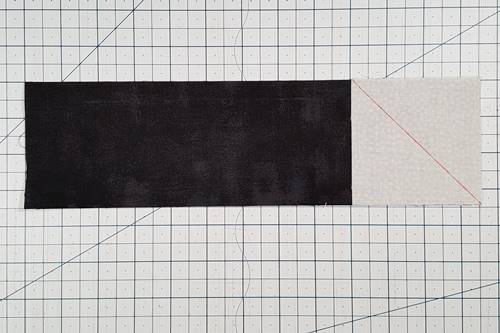
Note: Stitching the small square to the right hand side of the bottom sill strip will make a right facing attic window block.
If you want an attic window quilt block that faces to the left, place the small square on the left end of the bottom sill strip.
Step 5 Place the 1/4 inch measurement line of a quilting ruler on the seam of the stitched on square and trim the corner 1/4 inch from the seam line.
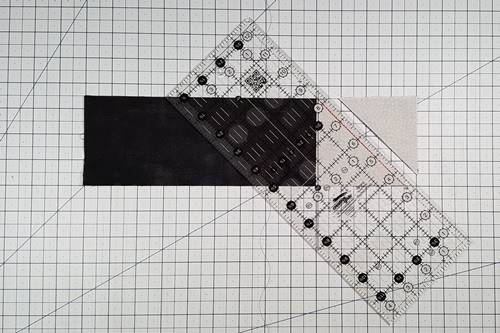
See, no Y seam! Instead, we used the stitch and flip technique to make a 45 degree angle (or faux Y seam) in bottom sill.
Step 6 Flip the corner right side up and press the seam up, toward the side strip (Fabric B).
Arrange the window (large square) and side in relation to the bottom sill as shown in the photo below.
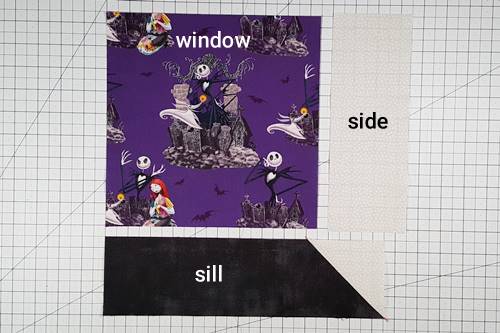
You can see the attic window quilt block begin to take shape.
Note: Stitching the side strip to the right hand side of the large square (window) will make a right facing attic window block.
To get a left oriented attic window quilt block, place the side strip to the left of the large square (window). In Step 10 see a photo of a completed left facing attic window.
Step 7 With right sides together, stitch the side strip to the large square.

Step 8 Flip the side strip right side up and press the seam towards it.
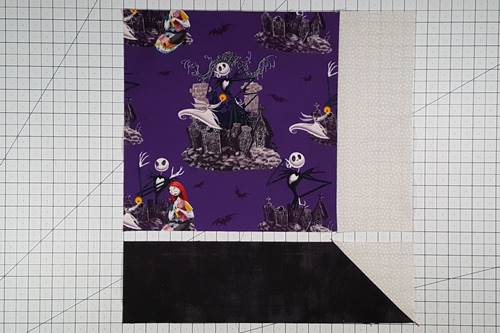
Step 9 With right sides together, stitch the bottom sill unit to the large square/side strip unit.
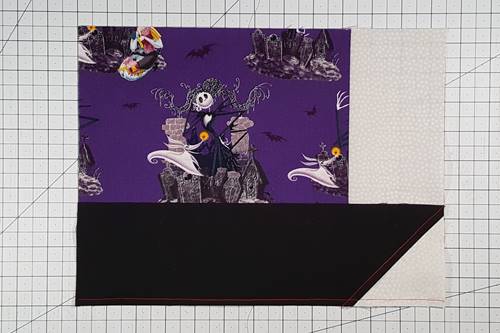
Step 10 To complete the attic window quilt block flip the bottom sill right side up and press the seam towards it. Your attic windows quilt block is complete!
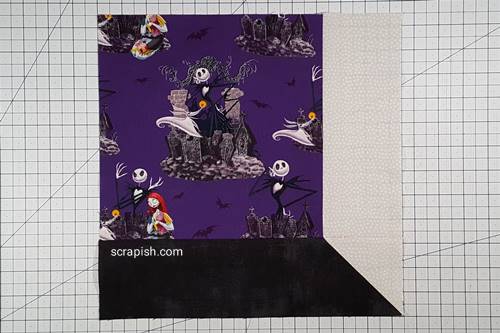 8 inch block: 6 inch square and 2 inch side and bottom
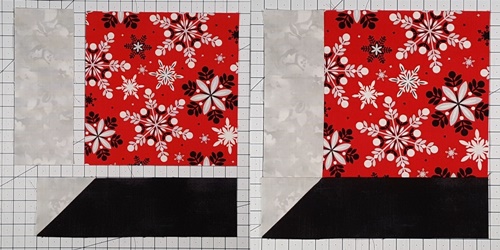
Here's a left oriented attic window quilt block. This is an 8 inch block with a 6 inch square and 2 inch side and bottom.
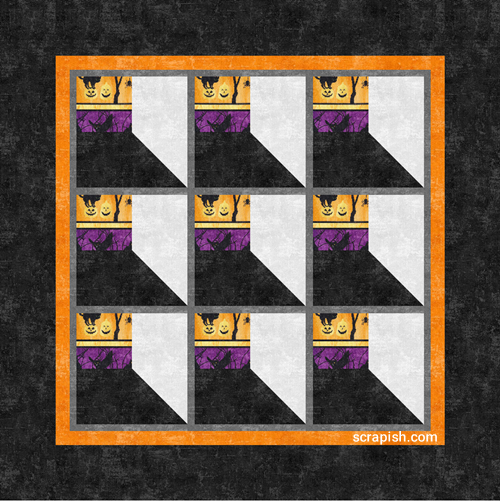
Attic Window Quilt Pattern Idea
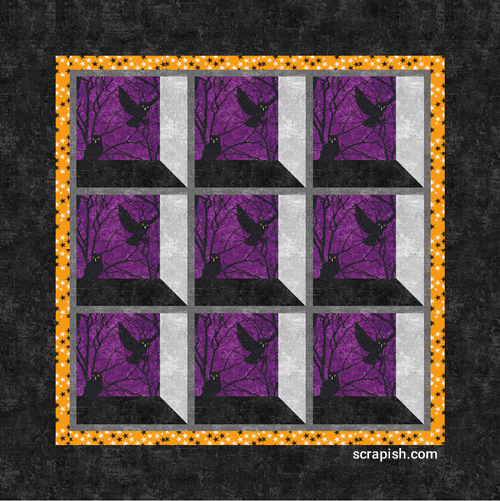
Here's what an attic window quilt block would look like in a quilt.
This quilt design is 36 x 36 inches and uses an 8 inch attic window block. There are 9 blocks edged by 1/2 inch sashing strips as well as a 1/2 inch inner border. The middle border is 1 inch and the outer border is 4 inches wide.
This design using Halloween themed and coordinating almost-solid fabrics makes a great wall hanging size attic window quilt pattern.
Attic Window Quilt Block and Pattern - Wide Shadows
Below is an attic window quilt block and pattern with wide shadows. See the Block Size Chart above for 8 Inch Finished Size (small window / extra wide shadow). made using a 4 inch center square and a 4 inch side and bottom.
 attic window quilt block wide shadows (4 inch square, 4 inch side and bottom)
Below is an attic window quilt pattern with wide shadows using the 8 Inch Finished Size (extra wide shadow) block measurements.
 attic window quilt pattern wide shadows (4 inch square, 4 inch side and bottom)
Six Ways To Make An Attic Window Quilt Block Video
There are many ways to make an attic window quilt block. Laura Ann Coia, a quilter and publisher of the SewVeryEasy YouTube channel, shows us 6 ways in the video below.
The method that I demonstrate above is her Method 3 and starts in the video at about the 9 minute mark (which I have queued). To see all of the methods demonstrated simply play the video from the beginning.
Subscribe to the Quilt Blocks Digest newsletter for updates, special offers & exclusive content!
You will receive an email asking you to confirm your consent to subscribe. You must click on the confirmation link contained in that email in order to be subscribed and receive emails.
Your email address is never shared. Unsubscribe any time.
