Subscribe to the Quilt Blocks Digest newsletter for updates, special offers & exclusive content!
- Home
- How to Quilt
- Stitch and Flip
Stitch and Flip Quilting Technique Tutorial
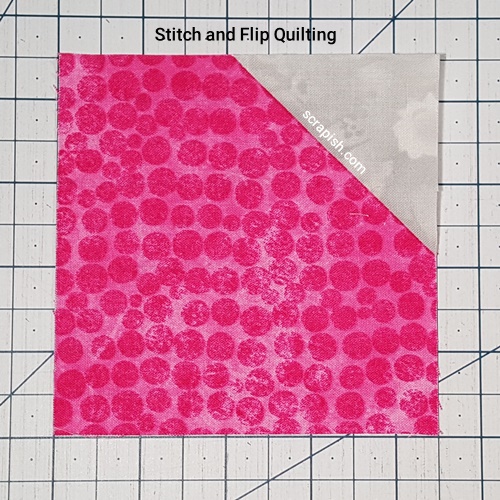
Stitch and flip is a handy technique. It is used to clip corners in quilt block units or quilt blocks themselves. Flying geese is an example of this technique in use.
The basic technique uses a square to replace a corner of a unit that goes into a quilt block. Basically, you stitch the square to a corner and cut 1/4 inch away from along the seam.
When you flip what remains of the square is a triangle, or new corner. Magic!
The technique is commonly used to make traditional flying geese, snowball quilt blocks and the points of stars for lots of star blocks.
Stitch and Flip Method Math
The math for stitch and flip:
finished size of the length of the unit you want to replace plus 1/2 inch
For example, if I want to clip the corner of a 2 inch square, or a 2 inch area of a larger square, rectangle, etc., I will need a 2 1/2 inch square.
The possibilities are almost endless. Limited only by your imagination. The technique is so versatile and easy to master you will hardly believe it!
Let's see how to do this fantastically handy quilting method.
Stitch and Flip Quilting Method Instructions
Step 1 Cut two squares from Fabric B (say this is the background fabric). On the wrong side of each square, draw a diagonal line from one corner to the other using a ruler and a pencil.
Here, to make a boat shape, turn each square so that each diagonal line faces in opposite directions.
For the square on the left, the line slants in the same direction as a back slash (\). For the square on the right, the line slants in the same direction as a forward slash (/).
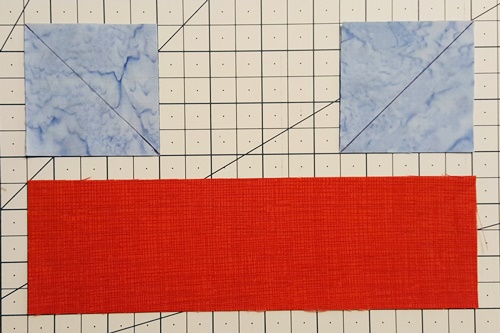
Here, I'm making part of a boat using a 2 1/2 inch wide rectangle. So, my stitch and flip squares are 2 1/2 inches. When the corners are cut, the bottom of the boat are revealed.
Step 2 With the right sides together, place one square in each corner of the rectangle (Fabric A) and pin in place.
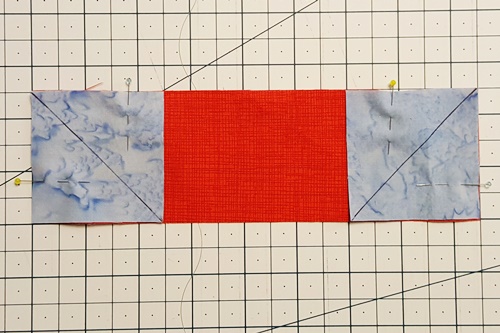
Step 3 Sew on the drawn line, or a thread or two away from it, to attach the squares to the rectangle. If you sew a thread or two away from the line, stitch on the side of the line closest to bottom corner of the square.
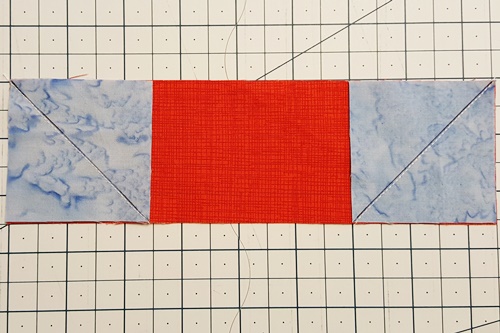
The reason to stitch a thread or two away from the line is to account for the fold in the fabric when the triangle is flipped, especially if you stitch with a heavy weight thread (say a 40 or 30 weight).
Here's a close up of the sewn seam line.
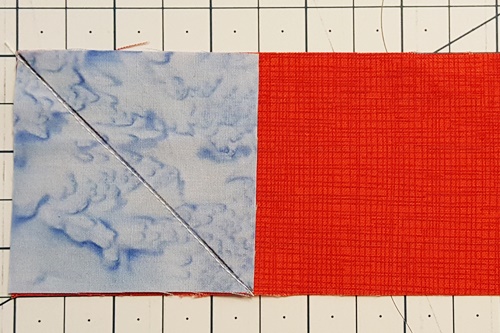 close up of seam line
Step 4 Before cutting away any fabric flip the top half of the square down to see if it will cover the part of the fabric, in this case the corner of a rectangle, that it will replace.
If it does not then you will need to take out the seam with the seam ripper and sew it again. If it does, in the next step you will cut the fabric.
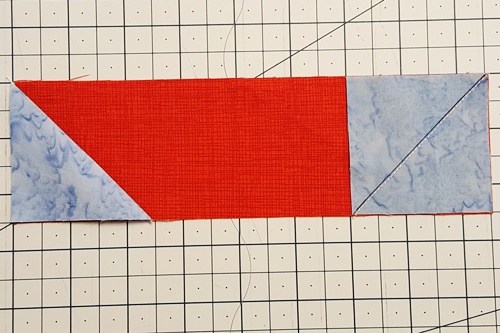
Step 5a Place the 1/4 inch line of a ruler along the seam line and using a rotary cutter make a cut along the ruler to cut away the bottom part of the triangle (corner).
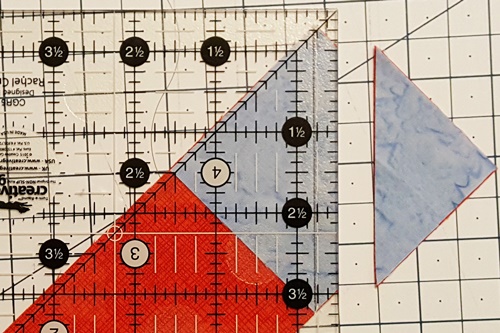
Step 5b Repeat Step 5a to cut/clip the second corner.
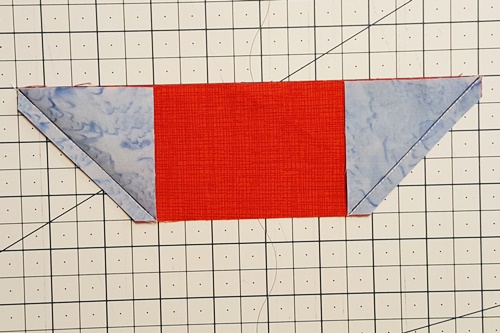
Step 6 Flip both corners right side up to reveal the new corners (triangles). Finger press seams towards triangles.
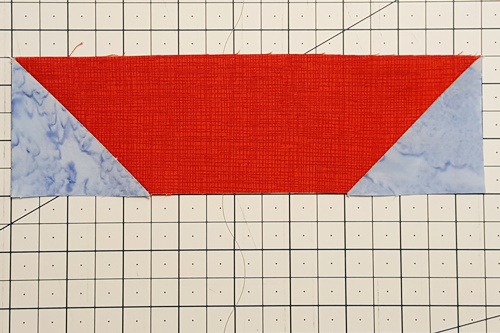
Give a final press with an iron and alternative starch solution, if desired.
The stitch and flip quilting technique (aka 'flip and sew') is used to make parts of lots of blocks. One is the sail boat quilt block pattern.
Break the Rules (a little)
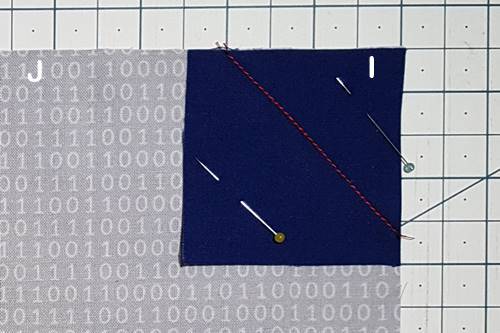
Sometimes you may not want the sewing lines to be down the middle of the square. The steps are the same, except draw the line where you need it to be and cut 1/4 inch away from the seam. Flip and trim. Check out the cat quilt block pattern to see how this plays out.
Stitch and Flip in Modern Quilts
Traditionally, the stitch and flip quilting technique is used quite often to make star points. However, it can be used to make units in modern quilt blocks as well. In modern quilting the technique can be used to make abstract blocks or more realistic blocks. See how this technique is used to make cat ears in this modern cat quilt block.
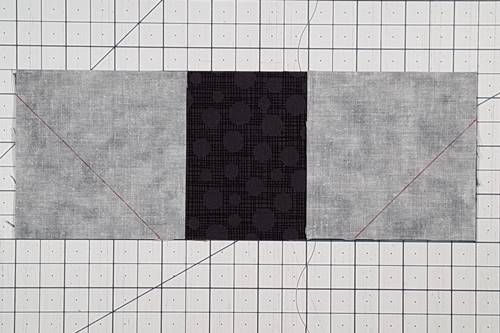
In modern quilting this is an improvisational technique. Free and loose you might say :-).
Folded Corner Clipper Tool
When you have a lot of units to make you may want not want to mark all those lines on the wrong side of all those squares. :-) For less work use the Folded Corner Clipper tool by Creative Grids (R). It's a small quilting ruler in the shape of a 45 degree triangle.
Simply align the width measurement line along the bottom of the small square with the solid black diagonal line (1/4 inch seam line) down the center. And then cut along the ruler's edge to clip the corner.
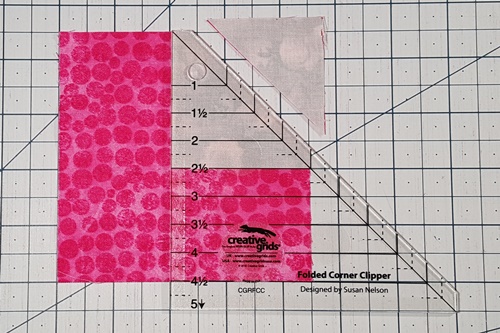
Stitch a 1/4 inch seam. Flip the triangle right side up and press toward the triangle.
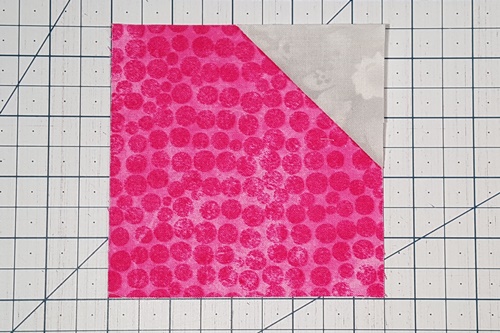
However you choose to use the stitch and flip quilting method the basic steps are the same:
- Cut a square
- Stitch the square on
- Cut 1/4 inch away from the seam
- Flip the triangle right side up
That's the stitch and flip quilting method!
Subscribe to the Quilt Blocks Digest newsletter for updates, special offers & exclusive content!
You will receive an email asking you to confirm your consent to subscribe. You must click on the confirmation link contained in that email in order to be subscribed and receive emails.
Your email address is never shared. Unsubscribe any time.
