Subscribe to the Quilt Blocks Digest newsletter for updates, special offers & exclusive content!
- Home
- Other Quilt Blocks
- Cat Head
Cat Quilt Block Pattern Tutorial
Cat's Head Quilt Block
Make a modern cat quilt block - depict a cat head. Get a size chart for 12 inch and 9 inch block sizes. Plus, see what it would look like in a quilt pattern!

Stitch and Flip Quilting Technique
To make this cat face block we'll use a quilting technique called stitch and flip to make the ears and the jaw line.
If you're not familiar with the technique, see step by step instructions of the stitch and flip quilting technique before continuing.
Cat Block Size Cutting Chart
|
9 Inch Finished Size |
12 Inch Finished Size |
|
Fabric A (cat head)
Fabric B (background)
|
Fabric A (cat head)
Fabric B (background)
|
In this quilt block tutorial, Fabric A (pink paisley) is our cat head and Fabric B (dark gray) is the background.
Cat Quilt Block Instructions
WOF= Width Of Fabric
Unless otherwise noted seams are 1/4 inch.
Refer to the Block Size Cutting Chart above for desired block size.
Step 1 Cut the fabric pieces according to the Block Size Cutting Chart.
Draw a diagonal line from one corner to corner of each square.

Step 2 Align Squares. Working with right sides together…
Align a large square on each end of the smaller rectangle. Align a small square in the bottom corners of the larger rectangle.
Align the square on the left side of each rectangle so that it faces like a \ (backslash).
Align the square on the right side of each rectangle so that it faces like a / (forward slash).

Step 3 Stitch a seam on each drawn line.

Step 4 Place the 1/4 inch measurement line of a quilting ruler on the seam of each stitched on square and trim the corners 1/4 inch from the seam line.

...the corner of each stitched on square trimmed.

Step 5 Flip each corner right side up and press the seams.
Top Rectangle (ears): press the seams toward Fabric A (or away from background fabric). Bottom Rectangle (face/jawline): press the seams toward Fabric B (or toward background fabric).

Step 6 With right sides together stitch "ears" unit to "face/jawline" unit.

Step 7 Press the seam down, toward the face/jawline unit.

The finished cat quilt block is ready for a modern quilt pattern!
Cat Quilt Block II
Bonus Cat Block
There are many different types of cats. And even the same cat can show different sides of its personality. To mimic this in the cat quilt block change up the ears.
The diagonal lines on the squares that make up the ears do not have to be directly in the center of the square. Make it somewhere south of the diagonal center of the square.
- Place a large square on a cutting mat within an area the same size as it is.
- Use the markings on the cutting mat and and a quilting ruler to determine where to draw the lines.
- Use a marking pen to draw the line along the edge of the quilting ruler.
- Repeat for the second large square or change only one ear.
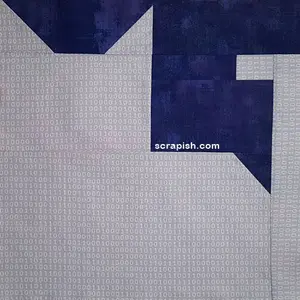
In the photo below I drew a diagonal line at about the 3 inch mark.

For both squares that make up the cat's ears I drew the line at different heights on the squares.

After stitching on the lines, trimming the corners and pressing the seams I squared up the rectangle.
Align a quilting ruler along the top and side of the rectangle and trim the excess fabric from each corner in turn.

To complete the cat quilt block stitch the ears unit to the face/jawline unit.

Cat Quilt Pattern Idea
The 12 inch cat quilt block would look like this in a quilt. Alternate it with 12 inch plain squares. The quilt is 96 x 96 inches, queen size. It has 20 cat quilt blocks and 15 plain squares. The alternating sashing rows and borders are 6 inches wide.

This cat quilt pattern has a modern appeal. It uses three shades of mottled gray fabric for the cat blocks and a mottled dark gray/black for the background fabric.
Sassy Modern Cat Quilt Blocks
Give this cat quilt block pattern a try. Change up your fabrics and bring the jungle to suburbia - make some sassy cats with animal print fabrics! It's so easy for beginners...

You might like these
Cat Quilt Block Pattern Tutorial - Easy for Beginners!
Make a cat quilt block pattern with squares and rectangles. Use scraps or strips. Make a 12 inch cat block and see what it would look like in a quilt pattern!
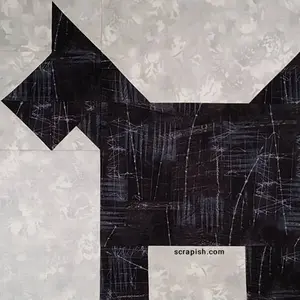
Scottie Dog Quilt Block Pattern Tutorial - Easy for Beginners!
The Scottie dog quilt block is a traditional block with modern appeal. Make a 12 inch block and see what it would look like in an easy quilt pattern!
Subscribe to the Quilt Blocks Digest newsletter for updates, special offers & exclusive content!
You will receive an email asking you to confirm your consent to subscribe. You must click on the confirmation link contained in that email in order to be subscribed and receive emails.
Your email address is never shared. Unsubscribe any time.
Recent Tutorials
-
Double Friendship Star Quilt Block Tutorial
Apr 05, 26 10:35 PM
 The double friendship star quilt block is easy to make. See step-by-step how and get fabric requirements for five sizes including 12 inch and bigger!
 -
Courthouse Steps Quilt Block Pattern Tutorial
Oct 23, 22 02:11 PM
See step-by-step how a courthouse steps quilt block pattern is stitched. It's a great companion block to use with star quilt blocks. -
Churn Dash Quilt Block Pattern Tutorial - 6 Inch, 9 Inch and 12 Inch
Jul 18, 22 07:11 PM
The churn dash quilt block looks difficult but is easy to piece. See step-by-step instructions with pictures. Get yardage for 3 sizes!


