Subscribe to the Quilt Blocks Digest newsletter for updates, special offers & exclusive content!
- Home
- How to Quilt
- Half Square Triangle Ruler
How to Use a Half Square Triangle Ruler Tutorial
A half square triangle ruler is very handy when making lots of half square triangles for a quilt. See how to use two different types of HST rulers.
 Half Square Triangle Ruler") Creative Grids (R) Half Square Triangle Ruler Style 1 - Blunt Tip
Creative Grids (R) Half Square Triangle Ruler Style 1 - Blunt TipStyle 1 HST ruler has a blunt tip at the top. This accounts for the offsetting 1/4 inch tips that you usually need when sewing two triangles together.
Half Square Triangle Ruler Chart
To use most HST rulers, cut 2 strips of fabric 1/2 inch larger than the finished size of your HST, align right sides together, align top of ruler with top edge of strips and the ruler's measurement line with bottom edge of the strips. Cut along right edge of ruler.
|
Finished Size of Half Square Triangles |
Cut 2 Strips This Width |
|
2 |
2 1/2 |
***Be sure to check and follow the instructions for your specific HST ruler.***
How to Cut HSTs from Strips Using a Half Square Triangle Ruler
Step 1 Cut 2 fabric strips to that measurement (Here, my HSTs need to finish at 4 inches so I cut my strips 4 ½ inches wide).
Place the fabric strips right sides together on a cutting mat. Locate the corresponding measurement line on your HST ruler and align it along the bottom edge of the fabric strips.
The top edge (blunt edge) of your HST ruler should align with the top edges of the fabric strips.
Place the numbered straight side of the ruler ¼ inch or so to the right of the selvage edges.
Using a rotary cutter, cut the fabric strips along the 45 degree angle side of the HST ruler.

Step 2 Rotate the ruler clockwise 180 degrees (so blunt tip points south). Align the blunt tip with the bottom of the fabric strips and the 45 degree angle side with the previously cut 45 degree edge.
Using a rotary cutter, cut the fabric strips along the 90 degree angle (straight) side of the HST ruler.

(We'll deal with the selvage edge half square triangle in Step 5.)
Step 3 Rotate the ruler clockwise 180 degrees (so blunt tip points north). Align the top of the ruler with the top of the fabric strips. Align the straight side of the ruler with the straight edges of the fabric.
Using a rotary cutter, cut the fabric strips along the 45 degree angle side of the HST ruler.

Step 4 Repeat Steps 2 and 3 until you've cut the required number of half square triangles or the number allowed by the length of the strips.
Step 5 Now for the selvage edge half square triangle... Rotate it and the ruler clockwise 180 degrees. Align the 45 degree side of the ruler with the 45 degree angle side of the fabric.
The top (blunt end) of the ruler should align with the bottom edge (what used to be the top) of the fabric strips. The cut size of the fabric strip (4 1/2 inches) and the corresponding measurement line on the ruler should line up with one another.
Cut the fabric strips along the straight edge of the ruler, removing the selvage edges.

Step 6 With the blunt end of the half square triangle going through the needle first,

stitch each HST with a 1/4 inch seam. So easy to stitch!

Step 7 Open the half square triangles with the right side of the fabric up.
Press the seams as directed or towards the darker fabric.
Clip the one dog ear off the HST.

How to Use a Half Square Triangle Ruler Style 2
Style 2 HST ruler has a full triangular tip. The tip is highlighted (or sometimes blackened). Align the top edge of the strips with the bottom edge of the highlighted triangle and the ruler's measurement line with bottom edge of strips.
A number of these rulers do double duty. They are used to cut quarter square triangles as well. Here, I will only discuss the use of this ruler for cutting half square triangles.
 Half Square Triangle Ruler") Fons and Porter (R) half square triangle and quarter square triangle combo ruler
Fons and Porter (R) half square triangle and quarter square triangle combo rulerHow Ruler Style 2 Aligns with Fabric
Here's how you line up ruler Style 2 to cut the strips of fabric. The the bottom of the colored tip (or the line marking the tip) is aligned with the top edge of the fabric.
The remaining instructions are the same as noted above for ruler Style 1.

There are other markings on this ruler as well. It practically does everything except cut the fabric for you! :-)
Spot these symbols/instructions on the ruler pictured above as numbered below…
- Offsetting tip
- Half square triangle symbol
- Strip width to cut
- HST finished size
- HST cutting diagram
Advantages of Using a Half Square Triangle Ruler
These are just some of the advantages of using a HST ruler to make half square triangles...
- Make lots of HSTs quickly
- No waste
- No drawing lines on fabric
- No squaring up (usually)
You might like these
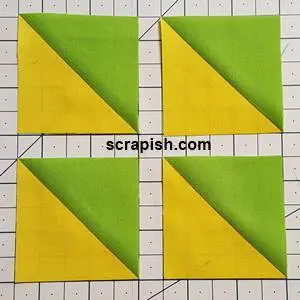
Half Square Triangles Tutorial
Half square triangles (HSTs) are used in many quilt block patterns. They make a quilt dynamic, or 'move'. Expand your quilting options!
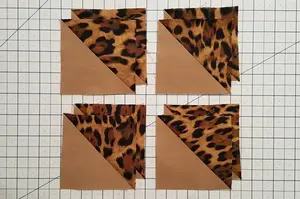
Half Square Triangles 8 At A Time
Half square triangles 8 at a time is the way to go if you need a lot of them. It's easier than you think!
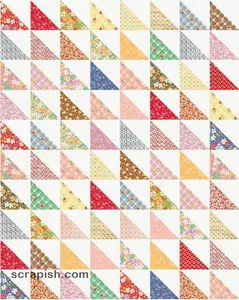
Easy Half Square Triangle Quilt Pattern Tutorial
A scrappy half square triangle quilt pattern for beginners that uses two charm packs - 5 inch charms for a baby quilt, 10 inch squares for a twin size.
Subscribe to the Quilt Blocks Digest newsletter for updates, special offers & exclusive content!
You will receive an email asking you to confirm your consent to subscribe. You must click on the confirmation link contained in that email in order to be subscribed and receive emails.
Your email address is never shared. Unsubscribe any time.
Recent Tutorials
-
Double Friendship Star Quilt Block Tutorial
Apr 05, 26 10:35 PM
 The double friendship star quilt block is easy to make. See step-by-step how and get fabric requirements for five sizes including 12 inch and bigger!
 -
Courthouse Steps Quilt Block Pattern Tutorial
Oct 23, 22 02:11 PM
See step-by-step how a courthouse steps quilt block pattern is stitched. It's a great companion block to use with star quilt blocks. -
Churn Dash Quilt Block Pattern Tutorial - 6 Inch, 9 Inch and 12 Inch
Jul 18, 22 07:11 PM
The churn dash quilt block looks difficult but is easy to piece. See step-by-step instructions with pictures. Get yardage for 3 sizes!


