Subscribe to the Quilt Blocks Digest newsletter for updates, special offers & exclusive content!
- Home
- How to Quilt
- Triangle in a Square
Triangle In a Square Quilt Block Tutorial
The triangle in a square unit... Small for star blocks. Large for a standalone quilt block. Learn how to use tri recs triangle rulers to make it. It's easy!

This little unit is a powerhouse! It's used in a number of star quilt blocks. Straight and Narrow, Pineapple, Sun Rays Quilt are a few. But the most notable might be the Fifty Four Forty or Fight (54-40 or fight) quilt block (link at bottom of page).
The unit is also known as 'Spiky and Peak'. The smaller side triangles are 'Spiky' and the larger center triangle is 'Peak'.
Tri Recs Triangle Rulers
Yes, rulers, plural. You'll need the set. There are 2 companion rulers - a Tri and a Recs. The Tri (short for triangle) is used to make the center triangle, or peak. The unit will be the same regardless of the side of the fabric it's cut from.
 triangle in a square rulers, or tri recs rulers
The Recs (short for rectangle) is used to make the side triangles, or spikes. These pieces
are mirror images. Double your fabric to cut them. Make sure the fabric is either wrong sides together or right sides together. There is a left and right spike.
Strip Quilting
The rulers are meant to be used with strips of fabric. Cut a strip of fabric 1/2 inch wider than the finished size of the unit needed.
For example, if you want 4 inch finished size triangle in a square units cut a strip of fabric that is 4 1/2 inches wide. The strip does not have to be width of fabric long, but should be long enough for the required number of units.
Triangle in a Square Instructions
WOF= Width Of Fabric
Unless otherwise noted seams are 1/4 inch.
Cut the Center Triangle (or Peak)
Step 1 Cut a strip of fabric 1/2 inch larger than the finished size of the required triangle in a square unit. My strip is doubled with wrong sides together. In this demo, I cut a 4 1/2 inch strip to get a 4 inch finished size unit.
Place the blunt tip of the Tri tool at the top of the strip. The width that you cut the strip... this corresponding measurement line on the ruler should line up with the bottom of the strip. In this demo that's the 4 1/2 inch measurement line.
Use a rotary cutter to cut the strip along the right edge of the ruler.

Leave this first piece as is. We will come back to it once we have cut the other units.
Step 2 Rotate the Tri ruler 180 degrees. Now the blunt tip should line up with the bottom edge of the fabric strip. The width of the strip measurement line on the ruler lines up with the top edge of the fabric strip. Line up the left side of the Tri ruler along previously cut edge.
Use a rotary cutter to cut the fabric along the right edge of the ruler.

Step 3 Rotate the Tri ruler 180 degrees. Now align blunt tip with the top edge of the fabric. And the width of the strip measurement line on the ruler should line up with the bottom edge of the fabric strip. Line up the left side of the Tri ruler along previously cut edge.
Use a rotary cutter to cut the fabric along the right edge of the ruler (I only needed four center triangles so I didn't actually make the cut).

Repeat Steps 2 and 3 until you have cut all of the units that you need, or to the end of the
strip.
Step 4 Let's go back to the first piece we cut from the strip. When I use my rotary cutter, I like I cut away from my body. Cutting this first piece in its original position would mean cutting towards my body. Dangerous.
To finish cutting this first center triangle, rotate the piece 180 degrees so that the uncut side is on the right. Place the tip of the ruler at the bottom of the strip and the measurement line at the top of the strip. Make a cut along the right edge of the ruler. Your center triangle is now completely cut.

Use Recs Ruler to Cut Side Triangles (or Spikes)
The process will be repeated with the Recs tool with one additional cut. On your ruler's tip notice the slanted edge. On the Recs tool we need to cut along this edge as well.
Step 5 Cut a strip of fabric the same width as was cut for the center square in Step 1 (in this demo that's 4 1/2 inches). Make sure it's right sides or wrong sides together because we need mirror image, or left and right, side triangles.
Place the Recs tool well to the right of any selvage edges. Line up the blunt tip with the top edge of the strip. The measurement line on the ruler that is the same as the width of the strip should align with the bottom edge of the strip.
Use a rotary cutter to cut the fabric along the right edge of the ruler.

Leave this first piece as is and we will come back to it once we have cut the other units.
Step 6 Rotate the Recs ruler 180 degrees. Now, the blunt tip lines up with the bottom edge of the fabric strip. The measurement line on the ruler that is the same width of the strip should line up with the top edge of the fabric strip.
Line up the left side of the Recs ruler along previously cut edge. Use a rotary cutter to cut the fabric along the right edge of the ruler.

Step 7 See the slanted edge of the ruler's tip highlighted by the blue circle in the photo below? It should be on the bottom edge of the fabric strip. Use a rotary cutter to cut away the tiny piece of fabric. Later, this short edge will be used to align the spikes with the center
triangle.

Step 8 Rotate the Recs ruler 180 degrees. The blunt tip should be back at the top edge of the fabric and the measurement line at the bottom edge. Align the left side of the ruler with the previously cut edge. Use a rotary cutter to make a cut along the right edge of the ruler and the slanted edge of the tip.
Repeat Steps 7 and 8 until you have cut all of the units that you need, or to the end of the strip.

Step 9 Back to the first piece we cut from the strip. To finish cutting this first set of side triangles, or spikes, rotate the fabric piece 180 degrees so the uncut side is on the right. Rotate the ruler, also 180 degrees, so the tip is at the bottom of the strip and the ruler's measurement line is at the top of the strip.
Use a rotary cutter to make a cut along the right edge of the ruler and the slanted edge of the tip.

Assemble the Triangle in a Square Units
Step 10 Right side up, separate a set of spikes into a left and right as shown in the photo below.

Step 11 Right side up, insert the center triangle between the two spikes.

Step 12 Right sides together, align the right side triangle's edge of the tip that was cut away along the bottom edge of the center triangle (see the corner highlighted by the blue circle in the photo below). Align the top tips of both triangles. Stitch the right side triangle to the center triangle.

Step 13 Flip the right side triangle right side up and press the seam towards it.

Step 14 Repeat Step 12 for the left side triangle.

Step 15 Press the seam towards left side triangle. Trim dog ears along the top, if desired. But they won't add much bulk in the seam allowance.
You have completed the triangle in a square unit!
Take note of the three areas highlighted by the blue circles. Because the pieces are not cut on a 45 degree angle the dog ears will not align exactly. This is not an error, this is how they should align.

Triangle In a Square Is Versatile
The triangle in a square unit is versatile... Highlight the center triangle (left) or the side triangles (right).
 or the side triangles (right).")
Simply use a focus fabric to highlight the your chosen element against the background fabric. Then stitch the unit appropriately with peak pointing up or out, or with the spikes up or out. You'll see what I mean in the star quilt blocks linked below.
Spiky and Peak: Unit or Quilt Block?
In smaller sizes the triangle in a square is commonly referred to as a unit. In larger sizes, some quilters refer to it as a quilt block.
Check out the photo below. The small triangle in a square unit is 4 1/2 inches (unfinished) and the larger 'block' is 9 1/2 inches (unfinished).

Tri Recs Triangle Rulers
Versions of tri recs rulers are made by different manufacturers. The Creative Grids (R) rulers allows you to make a triangle in a square up to 9 inches. The version made by most other manufacturers allows you to make units up to 6 inches.
Whether you want to call it a quilt block or unit you can use it in borders, star blocks, tree blocks or to symbolize mountains. This is just a few of the many things you can do with triangle in a square!
You might like these
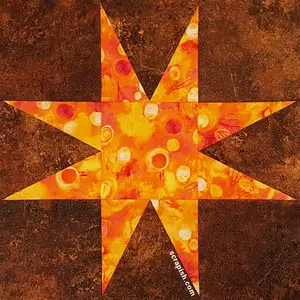
Galaxy Star Quilt Block Variation Pattern Tutorial - An Uneven Star
Unlike the galaxy star quilt block, a variation of it is quick and easy. Find out the basic rulers used to make this uneven star. You may already have them!
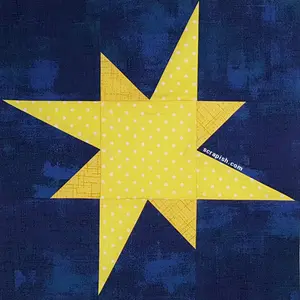
Eight Pointed Star Quilt Block Pattern Tutorial - Easy for Beginners!
This easy eight pointed star quilt block pattern uses triangle in a square units as star points. It's easy to make using Tri Recs rulers!
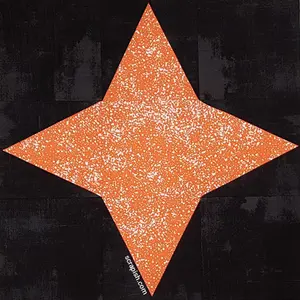
Triangle In a Square Star Quilt Block Tutorial Using Tri Recs Rulers
The triangle in a square star has four points. It's an Arkansas Snowflake quilt block variation. Easy when made using tri recs triangle rulers!
Subscribe to the Quilt Blocks Digest newsletter for updates, special offers & exclusive content!
You will receive an email asking you to confirm your consent to subscribe. You must click on the confirmation link contained in that email in order to be subscribed and receive emails.
Your email address is never shared. Unsubscribe any time.
Recent Tutorials
-
Double Friendship Star Quilt Block Tutorial
Apr 05, 26 10:35 PM
 The double friendship star quilt block is easy to make. See step-by-step how and get fabric requirements for five sizes including 12 inch and bigger!
 -
Courthouse Steps Quilt Block Pattern Tutorial
Oct 23, 22 02:11 PM
See step-by-step how a courthouse steps quilt block pattern is stitched. It's a great companion block to use with star quilt blocks. -
Churn Dash Quilt Block Pattern Tutorial - 6 Inch, 9 Inch and 12 Inch
Jul 18, 22 07:11 PM
The churn dash quilt block looks difficult but is easy to piece. See step-by-step instructions with pictures. Get yardage for 3 sizes!


