Subscribe to the Quilt Blocks Digest newsletter for updates, special offers & exclusive content!
- Home
- Other Quilt Blocks
- Christmas Tree
Christmas Tree Quilt Block Pattern Tutorial
Make this easy Christmas tree quilt block using a 60 degree quilting ruler. Create an entire forest in no time!

Sixty (60) Degree Ruler (Template)
Of course you know I love a 12 inch block! And, I wanted a big, but not humongous, Christmas tree block.
If you're like me you have a lot of quilting rulers. I checked my stash and decided that the 60 degree ruler could best get the job done. It's tall and wide, or big and bold if you like.
It took me a number of tries to get the measurements just right for 12 inch Christmas tree block. I can't tell you how many pictures I took. Several hundred, maybe. I know, a lot, right? :-)
Here are the results!
Block Fabric Requirements
Fabric A: Christmas tree, or main triangle (blue print)
Fabric B: side triangles, or background (cream)
Fabric C: tree trunk (med gray)
Measurements for Main and Side Triangles
|
Block Size (inches) |
Fabric Size (at least) |
60 Degree Ruler Measurement Line* |
|
6 inch |
Fabric A: 1 (5 x 7 inch) Fabric B: 2 (5 x 3 1/2 inch) |
5 inch 5 inch |
|
12 inch |
Fabric A: 1 (11 x 13 inch) Fabric B: 2 (11 x 7 inch) |
11 inch 11 inch |
*Use the same ruler measurement line for both the main triangle and the side triangles.
Fabric Measurements for Tree Trunk
|
Block Size (inches) |
Fabric B Background (at least) |
Fabric C Trunk (at least) |
|
6 inch |
3 x 2 inch |
1 1/2 x 2 inch |
|
12 inch |
5 1/2 x 2 inch |
2 1/2 x 2 inch |
Choose your block size, 6- or 12-inch, and let's make a Christmas tree quilt block!
Christmas Tree Quilt Block Instructions
WOF = Width Of Fabric
Seams are 1/4 inch unless otherwise noted.
Cut Out Christmas Tree (or Main Triangle)
Step 1 Refer to size chart above. From Fabric A cut a piece of fabric or a WOF strip. Place the ruler's measurement line on the bottom edge of the fabric and 1/4 inch in from the straight edge of the fabric. Align blunt tip with the top edge of the fabric.

Step 2 Using a rotary cutter, cut the fabric on each side of the ruler, leaving a 60 degree triangle. The left side triangle can now be used in another 60 degree quilt block.

Note: To cut more main triangles from a WOF strip, rotate the ruler 180 degrees. Align the blunt tip with the bottom edge of the fabric strip. Align the ruler's measurement line (according to block size) along the top edge of the fabric strip and the left side of the ruler with the angled fabric edge. Make a cut along the right edge of the ruler.

Cut Side Triangles
Step 3a From Fabric B cut a piece of fabric or a WOF strip. Cut a straight edge to remove the selvages. Place the ruler's horizontal measurement line on the bottom edge of the fabric strip while aligning the left vertical dotted line along the cut straight edge. Make a cut along the right edge of the ruler.

Step 3b Cut along the left tip of the ruler, removing the bit of fabric. Removing this bit of fabric will help to align the side triangles with the main triangle in a later step.

Note: To cut more side triangles from a WOF strip, use a regular quilting ruler to cut a straight edge to the right of the angled edge of the fabric.
Place the ruler's 1/4 inch measurement line 1/4 inch in from the angled cut along the bottom edge of the fabric strip as shown in the photo below. Make a cut along the right edge of the ruler.

Now you have more side triangles. To cut the next one use the 60 degree ruler as in Step 3a. Continue to alternate between the two rulers to finish cutting the strip into side triangles.
Cut Christmas Tree Trunk Fabric
Step 4 Refer to the size chart above. From Fabric B, cut two rectangles. From Fabric C, cut one rectangle. Arrange all fabric pieces as shown in the photo below.

Stitch Background Side Triangles to Tree Triangle
Step 5a With right sides together, align the left side triangle along the left side of the main triangle. Stitch a 1/4 inch seam.

Step 5b Be sure to match the bottom flat tip of the side triangle with the bottom edge of the main triangle as shown in the photo below.

Step 6 Press the seam towards the background Fabric B, leaving side triangle right side up.

Step 7 Repeat Steps 5 and 6 for the right side triangle.

Make Christmas Tree Quilt Block Tree Trunk
Step 8 With right sides together, stitch the tree trunk fabric piece (Fabric C) to the left background Fabric B.

Step 9 With right sides together, stitch the left Fabric B background piece to the Fabric C tree trunk piece. Press seams toward the background Fabric B.

Stitch Sections Together
Step 10 Fold both sections in half vertically and finger press a crease in the center of each.

Step 11 With right sides together, match the creases on both sections. Stitch a 1/4 inch seam. Press the seam towards the main triangle, Fabric A.

Trim Christmas Tree Quilt Block
Step 12 Trim the block to size. Trim the Christmas tree block 1/4 inch past the
three points on the tree, or main triangle. Trim any excess fabric from the
trunk.
For a 12 inch Christmas tree block trim to 12 1/2 inches square. For a 6 inch Christmas tree block trim to 6 1/2 inches square.

Christmas Tree Quilt Pattern
I call this quilt pattern the Christmas Tree Forest. It's approximately 76 x 88 inches. Almost queen-size.

Twelve inch Christmas tree quilt blocks alternate with 6-inch blocks that have 3 inch borders to make a 12 inch block. There are 6 blocks per row and 7 rows. It has 42 total Christmas tree quilt blocks. Twenty-one of each size. To make a larger quilt simply add more blocks to each row and/or add more rows.
Two inch borders in the background fabric surround the forest. And a binding done in the same fabric as the darkest tree encloses the forest.
You might like these
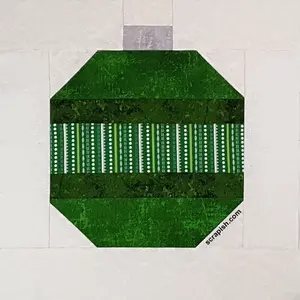
Ornament Quilt Block Pattern Tutorial | Free
Use strip sets to make a Christmas ornament quilt block pattern. Quickly make enough 6 inch and 12 inch ornament blocks for a bed quilt...easy!
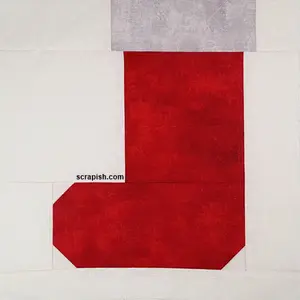
Christmas Stocking Quilt Block Pattern Tutorial | Free
Pair this Christmas stocking quilt block pattern with other 12 inch Christmas blocks to make a table runner. Easy quilting for beginners!
Subscribe to the Quilt Blocks Digest newsletter for updates, special offers & exclusive content!
You will receive an email asking you to confirm your consent to subscribe. You must click on the confirmation link contained in that email in order to be subscribed and receive emails.
Your email address is never shared. Unsubscribe any time.
Recent Tutorials
-
Double Friendship Star Quilt Block Tutorial
Apr 05, 26 10:35 PM
 The double friendship star quilt block is easy to make. See step-by-step how and get fabric requirements for five sizes including 12 inch and bigger!
 -
Courthouse Steps Quilt Block Pattern Tutorial
Oct 23, 22 02:11 PM
See step-by-step how a courthouse steps quilt block pattern is stitched. It's a great companion block to use with star quilt blocks. -
Churn Dash Quilt Block Pattern Tutorial - 6 Inch, 9 Inch and 12 Inch
Jul 18, 22 07:11 PM
The churn dash quilt block looks difficult but is easy to piece. See step-by-step instructions with pictures. Get yardage for 3 sizes!


