Subscribe to the Quilt Blocks Digest newsletter for updates, special offers & exclusive content!
- Home
- Other Quilt Blocks
- Christmas Ornament
Christmas Ornament Quilt Block Pattern Tutorial
This Christmas ornament quilt block pattern uses a strip set to make 6 inch and 12 inch ornament blocks. Easy quilting, even for beginners!

Strip Sets Make Beautiful Ornament Quilt Blocks
For those that celebrate Christmas decorating is a big thing. I mean there are Christmas trees, Christmas ornaments, Christmas stockings and of course gifts. The list seems endless doesn't it! :-)
Quilters can get in on the action too... For quick gifts we make table runners or toppers, bed runners or wall hangings. The Christmas ornament quilt block is a great choice to include in any of these.
And, it's the perfect block to use up some scraps! Leftover jellyroll strips are great candidates! You can even pull out some forgotten 10 inch squares, or layer cakes.
Quilt Block Pattern Assembly Diagram

Block Fabric Requirements
6 Inch Christmas Ornament Quilt Block
From Fabric 1 (white) cut:
A: 2 (3 x 1 1/2 inch)
B: 1 (1 1/2 X 1 inch)
D: 2 (4 1/2 x 1 1/2 inch)
E: 4 (1 1/2 x 1 1/2 inch) (shown as half square triangles)*
F: 1 (6 1/2 x 1 1/2 inch)
From Fabric 2 (med gray) cut:
C: 1 (1 1/2 X 1 inch)
From Fabric 3 (med green) cut:
G: 2 (4 1/2 x 1 1/2 inch) (shown as a trapezoid)*
From Fabric 4 (dark green) cut:
H: 2 (4 1/2 x 1 inch)
From Fabric 5 (med to light green print) cut:
I: 1 (4 1/2 x 1 1/2 inch)
12 Inch Christmas Ornament Quilt Block Pattern
From Fabric 1 (white) cut:
A: 2 (5 1/2 x 2 1/2 inch)
B: 1 (2 1/2 X 1 1/2 inch)
D: 2 (8 1/2 x 2 1/2 inch)
E: 4 (2 1/2 x 2 1/2 inch) (shown as half square triangles)*
F: 1 (12 1/2 x 2 1/2 inch)
From Fabric 2 (med gray) cut:
C: 1 (2 1/2 X 1 1/2 inch)
From Fabric 3 (med green) cut:
G: 2 (8 1/2 x 2 1/2 inch) (shown as a trapezoid)*
From Fabric 4 (dark green) cut:
H: 2 (8 1/2 x 1 1/2 inch)
From Fabric 5 (med to light green print) cut:
I: 1 (8 1/2 x 2 1/2 inch)
*Note: Block pieces E are squares and will be paired with rectangular block pieces G. The stitch and flip method will be used to make angled corners.
When cutting very short or small pieces of fabric you may want to cut your fabric lengths a little longer. Then, trim once stitched.
Choose your block size, 6 inch or 12 inch, or both and let's make some ornament blocks!
Christmas Ornament Quilt Block Instructions
WOF= Width Of Fabric
Seams are 1/4 inch unless otherwise noted.
Make a Strip Set
Step 1a Refer to the size chart above and choose your block size. From Fabrics 3 and 4 cut two strips each. From Fabric 5 cut one strip. Here, I'm using half WOF strips. Use whatever fabric cuts you have. (Missteps happen on a photo shoot. :-) I stitched two strips together prior to taking a photo.)
Layout the strips in this order: Fabric 3, 4, 5, 4, 3.

Step 1b With right sides together stitch the fabric strips together to make a strip set: Stitch Fabric Strip 4 (dark green) to 3 (med green).

Step 1c Stitch:
Fabric Strip 5 (green print) to 4 (dark green),
Fabric Strip 4 (dark green) to 5 (green print),
Fabric Strip 3 (med green) to 4 (dark green).

Press the Seams
Step 1d Press the center seams toward the center strip (Fabric 5, green print).
Press the outer seams toward the outer strips (Fabric 3, med green).

Cut or Trim Ornament Square to Size
Step 2 Cut or trim the Christmas ornament square to size:
For a 6-inch Block, trim or cut to 4 1/2 inches square.
For a 12-inch Block, trim or cut to 8 1/2 inches square.

Make Christmas Ornament Block Cap
Step 3 With right sides together stitch B to C (refer to quilt block assembly diagram above). Press seam toward C.
The section size should be:
For 6-inch Block: 1 1/2 inches square.
For 12-inch Block: 2 1/2 inches square.

Stitch Corners of Main Square
Use the stitch and flip method to trim the corners of the main square (refer to quilt block assembly diagram above). This portion of the Christmas ornament quilt block pattern is essentially a snowball block.
Step 4a Draw a diagonal line from corner to corner on the wrong side of the four
squares. Align a small square with each corner of the main square. The direction of the marked lines should should be as follows:
Top: forward slash (/), back slash (\)
Bottom: back slash (\), forward slash (/)

Step 4b Stitch on the drawn line of each of the four small squares. Trim each corner 1/4 inch away from the stitched line.

Step 4c Flip each corner triangle right side up and press the seams toward the
triangle.

Attach Side Panels to Main Square
Step 5 Stitch a side panel (D1 and D2, refer to quilt block assembly diagram above) to each side of the main square. Press the seams toward the side panels.

Assemble Christmas Ornament Quilt Block Pattern Cap
Step 6a Stitch stitch the left ornament cap section to side strip A1.

Step 6b Stitch side strip A2 to left ornament cap section. Press the seams toward side strips.

Step 7 Finger press a crease in the center of main square and cap sections. You can begin to see the Christmas ornament quilt block pattern take shape.

Stitch Sections Together
Step 8 Match the creases and stitch the cap section to the main square section. Press the seam toward the cap. (I used slightly longer strips and will trim them in Step 10.)

Step 9 Stitch Strip F to bottom of main square section. Press the seam toward Strip F.

Trim Christmas Ornament Quilt Block Pattern
Step 10 Trim the block to size: 12 1/2 inches square for a 12 inch Christmas ornament quilt block; 6 1/2 inches square for a 6 inch block.

Christmas Ornament Quilt Pattern
Now isn't this just the cutest Christmas ornament quilt pattern! It's approximately 96 x 96 inches - great queen-size quilt. It's modern and minimal.

The five rows that contain a Christmas ornament quilt block pattern are twelve inches wide. The rows start with a plain 12 inch block followed by 12 inch Christmas ornament quilt block. A 60 inch pieced strip finishes the row.
Between each ornament quilt block row is 6 inch x 84 inch sashing strips. There are four rows of sashing.
Six inch borders in the background fabric surround the main quilt body.
The binding is done in red fabric.
You might like these
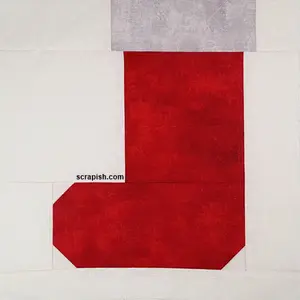
Christmas Stocking Quilt Block Pattern Tutorial | Free
Pair this Christmas stocking quilt block pattern with other 12 inch Christmas blocks to make a table runner. Easy quilting for beginners!
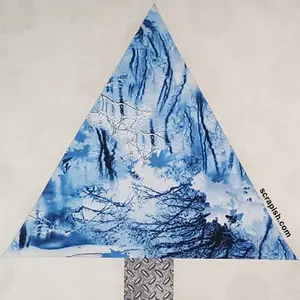
Christmas Tree Quilt Block Tutorial | Free Pattern
Try this easy Christmas tree quilt block...use a 60 degree quilting ruler as a template to make 6 inch, 12 inch or other size tree blocks!
Subscribe to the Quilt Blocks Digest newsletter for updates, special offers & exclusive content!
You will receive an email asking you to confirm your consent to subscribe. You must click on the confirmation link contained in that email in order to be subscribed and receive emails.
Your email address is never shared. Unsubscribe any time.
Recent Tutorials
-
Double Friendship Star Quilt Block Tutorial
Apr 05, 26 10:35 PM
 The double friendship star quilt block is easy to make. See step-by-step how and get fabric requirements for five sizes including 12 inch and bigger!
 -
Courthouse Steps Quilt Block Pattern Tutorial
Oct 23, 22 02:11 PM
See step-by-step how a courthouse steps quilt block pattern is stitched. It's a great companion block to use with star quilt blocks. -
Churn Dash Quilt Block Pattern Tutorial - 6 Inch, 9 Inch and 12 Inch
Jul 18, 22 07:11 PM
The churn dash quilt block looks difficult but is easy to piece. See step-by-step instructions with pictures. Get yardage for 3 sizes!


