Subscribe to the Quilt Blocks Digest newsletter for updates, special offers & exclusive content!
- Home
- How to Quilt
- Corner Triangles for Setting Blocks on Point
Corner Triangles for Setting Blocks on Point Tutorial
When the math for corner triangles for setting blocks on point is done for you it's easy to add triangles to a square. Get rotary cutting numbers here!

What are corner triangles?
Corner triangles are half square triangles used for setting or putting blocks on point. This quilting technique enlarges the original block.
The technique is also known as square in a square (or how to add triangles to a square). Half square triangles are used so that the straight of grain is on the outside edges of the block.
Math for Putting Blocks on Point
Determine the finished size of your quilt block. Multiply this number by 1.414. This is the finished size diagonal of the square. Then add .875 inches for seam allowance. Round up to the nearest 1/8 of an inch. This gives you the size of the squares to cut in half along their diagonal to get half square triangles. Here's the formula...
- Corner Triangles = finished block size / 1.414 + .875 = X inches
- Round X up to the nearest 1/8 of an inch to get Y inches.
How to Cut Corner Triangles
- Cut two squares the size of Y (given in a chart at end of page).
- Cut the two squares in half on the diagonal for a total of four corner triangles.
For example, if the block to be set on point is a 4 inch finished size block, cut 2 (3 3/4 inch) squares. Then, cut these two squares in half on the diagonal for a total of four corner triangles (which are really half square triangles).
Rounding up to the nearest 1/8 of an inch requires only little, if any, trimming and removal of the dog ears from the final block.
Oversized Corner Triangles
Cutting squares rounded to the nearest 1/4 of an inch results in an oversized square in a square quilt block that requires trimming. I prefer to make oversized blocks and trim them down.
Because we all don't make perfect cuts or sew perfect 1/4 inch seams,
the Corner Triangles for Setting Blocks on Point Chart provided after the instructions rounds
to both the nearest 1/8 and 1/4 of an inch. You choose how big to cut your squares.
Corner Triangles for Setting Blocks on Point Instructions
How to Add Triangles to a Square
Step 1 In the Corner Triangles for Setting Blocks on Point Chart locate the finished size of block/square to be set on point. Use the corresponding measurement to cut two squares this size. In the photo below, the finished size of my green square is 4 1/2 inches. So I cut 2 (4 1/4 x 4 1/4 inch) oversized corner triangle squares.

Step 2 Cut the two corner triangle squares in half along one diagonal.
You now have four half square triangles to use as corner triangles to set the block on point.

How To Sew A Triangle Corner
Step 3 Find the center of the sides of the block to be set on point and mark or fold it in half vertically and finger press a crease into the fold at the top and the bottom of the square. Fold the block in half horizontally and make a crease in the fold. (Folds are highlighted by the blue lines on the square.)
Fold each half square triangle in half along its diagonal edge and finger press a crease into the fold.

Step 4 With right sides together and matching marks or creases, place a triangle on two opposite sides of the square (or block). Stitch a 1/4 inch seam. Press the seams toward the triangles.

Step 5 Repeat Step 4 on the last two sides of the square (or block).
.")
You've added corner triangles for setting blocks on point and the block is now a square in a square block. Next, it's time to trim or square up the block.

How to Square Up Square In a Square Block
Step 6a Position the block so that the inner square is on point. Along the top and right sides of the block, place the 1/4 inch measurement line of a square quilting ruler on the intersection of the inner square's top and bottom corners and the corner triangles (highlighted by the two blue circles).
Align the ruler so that the same vertical measurement line (may not be continuous on ruler) also runs through the middle of the inner square at the top and bottom corners (highlighted by the blue line).
Use a rotary cutter to make a cut along the top and right edges of the ruler.
This alignment squares up the top and right side of the square or block while also giving a 1/4 inch seam allowance on those sides.

Step 6b Rotate the rotate the block 180 degrees and Repeat Step 6a on the remaining two sides.
Corner Triangles Rounded to 1/8 vs Rounded to 1/4 Inch
Note: When using corner triangles rounded to 1/8 of an inch versus those rounded to 1/4 of an inch you really just need to trim the dog ears.

Square In a Square Block Trimmed
After adding the corner triangles for setting blocks on point the square in a square, or diamond in a square, the unit is complete!

Remember this 'squares on point quilt tutorial' for setting a block on point using corner triangles increases the block size. It adds corners whereas this method of making a square in a square keeps the block size the same by replacing corners.
Corner Triangles for Setting Blocks on Point Chart (inches)
Rotary Cutting Numbers for Setting Blocks On Point
Use this handy chart to determine the size squares you need to cut to set blocks on point. Now you can set that 12 inch quilt block on point! Of course, that's finished size. Just locate the number 12 in Column A. Move laterally across to Column B or C to find its corresponding number – 9 3/8 (Column B rounded to 1/8) or 9 1/2 (Column C rounded to 1/4 inch). Cut two squares this size. Then, cut those squares in half diagonally once, making four half square triangles.
Columns B and C are rotary cutting numbers for putting blocks on point.
|
Finished Size of Block To Be Set On Point |
Cut 2 Squares Then Cut Once on the Diagonal |
Cut 2 Oversized Squares Then Cut Once on the Diagonal |
|
A 2 2 1/2 3 3 1/2 4 4 1/2 5 5 1/2 6 6 1/2 7 8 9 9 1/2 10 12 15 16 18 20 |
B 2 3/8 2 3/4 3 3 3/8 3 3/4 4 1/8 4 1/2 4 7/8 5 1/8 5 1/2 5 7/8 6 5/8 7 1/4 7 5/8 8 9 3/8 11 1/2 12 1/4 13 5/8 15 1/8 |
C 2 1/2 2 3/4 3 1/4 3 1/2 4 4 1/4 4 3/4 5 5 1/4 5 3/4 6 6 3/4 7 1/4 7 3/4 8 1/4 9 1/2 11 3/4 12 1/2 13 3/4 15 1/4 |
Tips for Cutting Corner Triangles
Corner Triangles and Directional Prints
If you use directional prints for your corner triangles for setting blocks on point make sure to cut one square on the diagonal in the direction of a back slash (\) and and one square in the direction of a forward slash (/). This results in all lines or motifs going in the same direction when the corner triangles are sewn into a square in a square block.

Grain of Fabric Matters When Cutting Triangles
Straight Grain Edges: The lengthwise grain (parallel to selvage edge) and crosswise grain (perpendicular to selvage edge) are both considered straight grain (aka straight-of-grain).
Stick to cutting your squares from strips that have been cut from the fold edge to the selvage edge and you will be fine.
If you are cutting your squares from scraps and you cannot tell the grain, spray the fabric piece with starch or an alternative start solution before cutting squares from it. This should minimize any stretch in the fabric.
You might like these
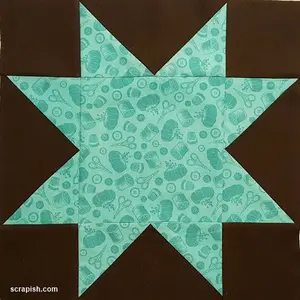
Star Quilt Block Pattern Tutorial - 12 Inch!
This easy star quilt block pattern (aka sawtooth star) makes an 8 point star using flying geese units and a square. Very beginner friendly!
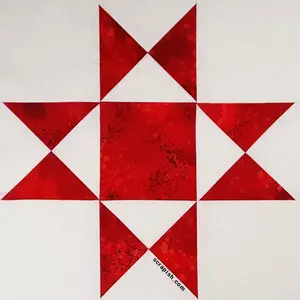
Ohio Star Quilt Block Made Easy and Fast, Even for Beginners
Ohio star quilt block directions using a quarter square triangle ruler. No lines to mark and very little trimming makes making a quilt faster.
Square in a Square Tutorial Made Easy for Beginners
Square in a square (aka diamond in a square) is used in lots of quilt blocks. The inner square is set on point and the outer triangles are made from squares.
Subscribe to the Quilt Blocks Digest newsletter for updates, special offers & exclusive content!
You will receive an email asking you to confirm your consent to subscribe. You must click on the confirmation link contained in that email in order to be subscribed and receive emails.
Your email address is never shared. Unsubscribe any time.
Recent Tutorials
-
Double Friendship Star Quilt Block Tutorial
Apr 05, 26 10:35 PM
 The double friendship star quilt block is easy to make. See step-by-step how and get fabric requirements for five sizes including 12 inch and bigger!
 -
Courthouse Steps Quilt Block Pattern Tutorial
Oct 23, 22 02:11 PM
See step-by-step how a courthouse steps quilt block pattern is stitched. It's a great companion block to use with star quilt blocks. -
Churn Dash Quilt Block Pattern Tutorial - 6 Inch, 9 Inch and 12 Inch
Jul 18, 22 07:11 PM
The churn dash quilt block looks difficult but is easy to piece. See step-by-step instructions with pictures. Get yardage for 3 sizes!


