Subscribe to the Quilt Blocks Digest newsletter for updates, special offers & exclusive content!
- Home
- Other Quilt Blocks
- Double Hourglass
Easy Double Hourglass
Quilt Block Pattern Tutorial
The double hourglass quilt block is super easy to make. Use a strip set, a little math (done for you!) and you can make a quilt that rocks!
To construct this block we will use a quarter square triangle (QST) ruler and strip sets.
How to Use a Quarter Square Triangle Ruler
Some QST rulers have a blunt tip and some have a pointed tip.
Rulers with a blunt tip have accounted for offsetting the triangles when stitching.
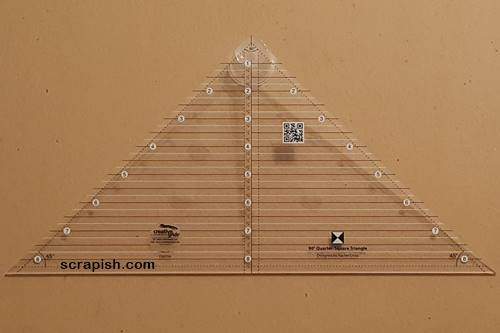 quarter square triangle ruler
If you use a ruler with a pointed tip you may need to offset the triangles by 1/4 inch. Check the instructions for your ruler.
The math and instructions that follow are for use when cutting strips with a blunt tip QST Ruler.
QST Anatomy
A single quarter square triangle (QST) is twice as long as it is wide. It takes 4 QSTs to make a square block.
To Use the Ruler
Divide your finished block size in half and add 1/2 inch for the seam allowance.
Place the ruler measurement line that corresponds with this measurement along the bottom edge of your strip set.
The Math
For a 6 inch finished size block that's
- 6 / 2 = 3 + 1/2 = 3 1/2
Ruler Measurement Line
Align the bottom edge of the strip set with the 3 1/2 inch measurement line on your QST ruler (you'll see this in the block instructions).
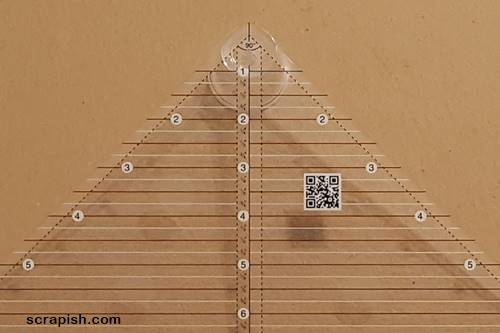 closeup of a quarter square triangle ruler with 1/4 inch measurement lines
Double Hourglass Block Math
The math for one double hourglass block strip is to divide the finished block size by two. Then, divide that result by two. Add 1/2 inch. Now, cut 2 strips in this size.
Double Hourglass Block Strip Formula
((Double Hourglass Block Finished Size / 2) / 2) + 1/2 inch
Double Hourglass Quilt Block Chart
Here's a chart that includes common sizes for the double hourglass block. The math has been done for you!
From Fabric A cut one strip, from Fabric B cut one strip as indicated below:
- For a 6 inch block, cut 2 (2 inch) strips. Stitch a strip set. Place 3 1/2 inch QST ruler measurement line on bottom edge of strip set.
- For a 8 inch block, cut 2 (2 1/2 inch) strips. Stitch a strip set. Place 4 1/2 inch QST ruler measurement line on bottom edge of strip set.
- For a 9 inch block, cut 2 (2 3/4 inch) strips. Stitch a strip set. Place 5 inch QST ruler measurement line on bottom edge of strip set.
- For a 12 inch block, cut 2 (3 1/2 inch) strips. Stitch a strip set. Place 6 1/2 inch QST ruler measurement line on bottom edge of strip set.
Double Hourglass Block Instructions
- All seams are 1/4 inch unless otherwise noted.
- Fabric A (print)
- Fabric B (solid)
Step 1a Make Strip Set Determine the finished size of your hourglass block. Use the math chart above to determine the size of your strips and cut one each from Fabrics A and B.
We are going to stagger the strips of our strip set. With right sides up place the strips next to one another.
Align the top strip in from the edge of the bottom strip the same number of inches as your strip is wide. In the case of my 6 inch block that's 2 inches in from the edge of the bottom strip.
Why stagger the strips? So as to not waste the beginning of the strip and depending on the size your QST you may be able to cut an extra QST.
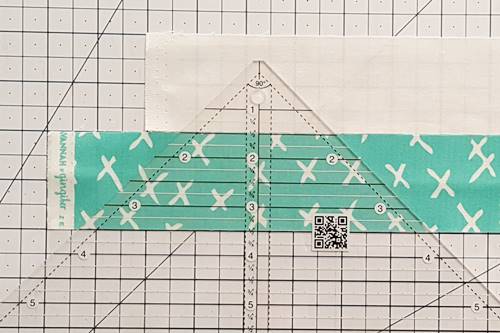
Place the correct measurement line of the quarter square triangle (QST) ruler along the raw edge of the bottom strip. (I am demonstrating a 6 inch block so I align along the 3 1/2 inch ruler measurement line.)
Place the left side of the ruler to the right of the selvage edge (or uneven edge).
Make any adjustments necessary in the top strip to make sure that the left edge of the ruler is placed on usable fabric (close to the selvage or raw end so as to not waste any usable fabric).
(1b) Place the right sides of the strips together and pin. Stitch a 1/4 inch seam along the right side of the strip set.
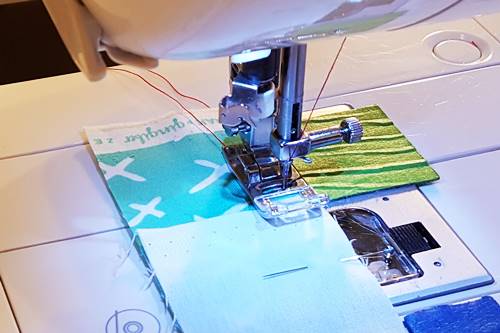
Step 2a Press the seam of the strip set toward the darker fabric.
(2b) Place the strip set right side up on your cutting mat. Align the correct measurement line of the quarter square triangle (QST) ruler along the raw edge of the bottom strip.
Here, I am making a 6 inch block. So, I placed the 3 1/2 inch measurement line along the bottom edge of the strip set.
(2c) Using a rotary cutter, cut the strip along the right and left sides of the ruler, making a QST.
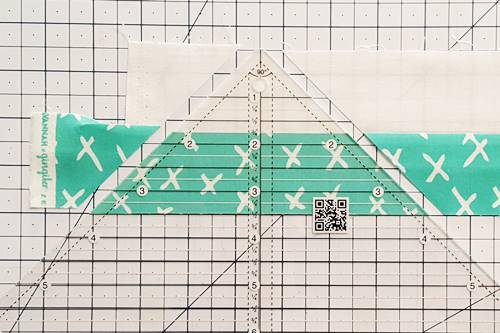
Step 3 Now rotate the ruler 180 degrees so that the blunt tip is aligned along the bottom edge of the strip set.
Align the left side of the ruler along the left side of the freshly cut strip set. Make a cut along the right side of the ruler, making a second QST.
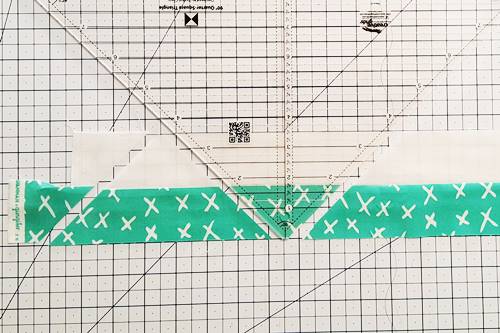
Step 4 Continue to rotate the ruler 180 degrees and cut QSTs until you have cut all of the QSTs that the strip set will allow.
Note: It is hard to get the entire strip set into one photo. Here you can see multiple quarter square triangles cut from the same strip.
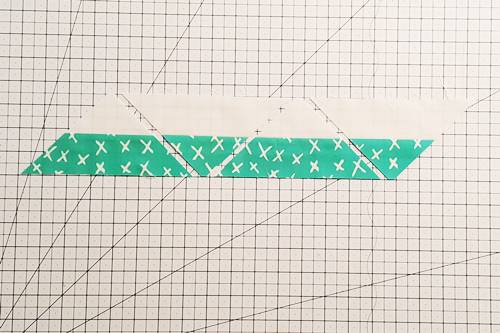
Step 5 Arrange 4 quarter square triangles into a double hourglass quilt block as shown in the photo below.
Use 2 QSTs that have the darker fabric in the top strip (numbered 2 and 4). Use 2 QSTs that have the darker fabric in the bottom strip (numbered 1 and 3).
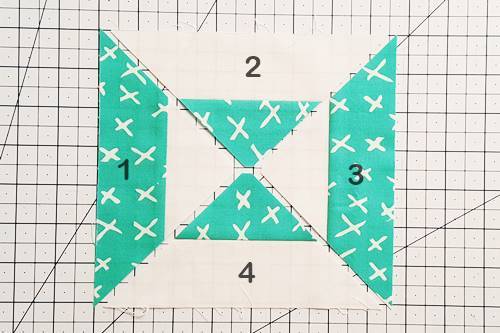
Step 6a (From the photo in Step 5 above) Pair QST Number 3, right sides together, with QST Number 4.
Pair QST Number 1, right sides together, with QST Number 2.
Pin, nesting the seams.
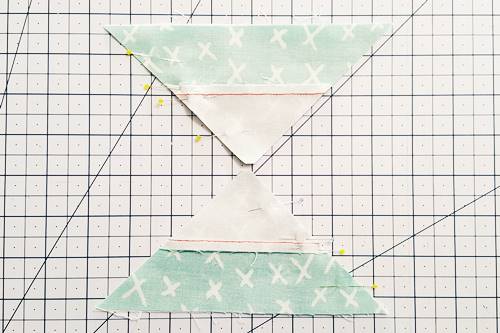
Step 6b With the blunt tip going under the needle first, stitch a 1/4 inch seam.
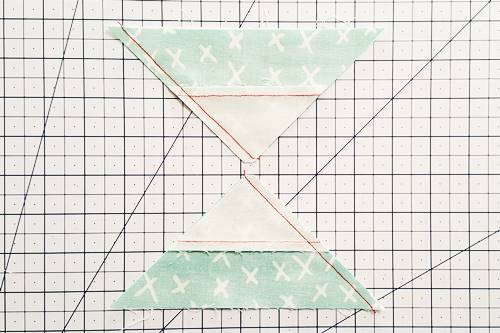
Step 7 Press the seams of each half in opposite directions (usually toward the fabric that is darkest in the center).
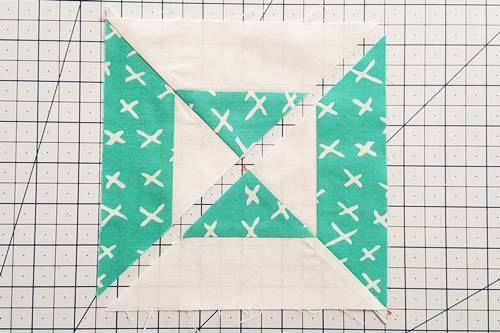
Step 8 With right sides together align the two halves along their long diagonal edge, nesting the three seams. Stitch a 1/4 inch seam.
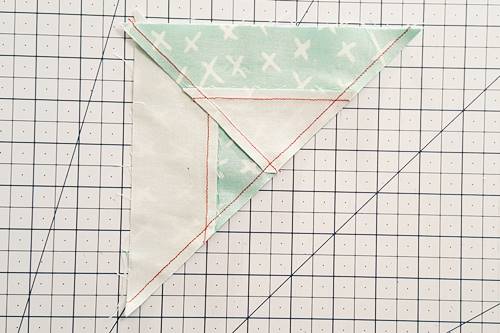
Double Hourglass Quilt Block
Step 9 Press the seam to one side. Trim off the dog ears.
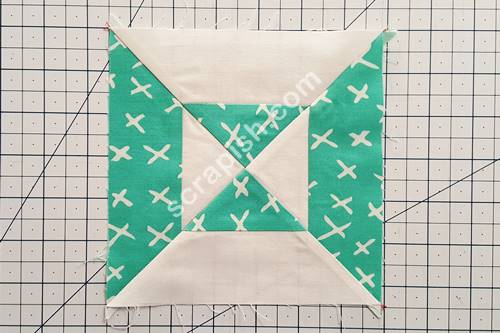
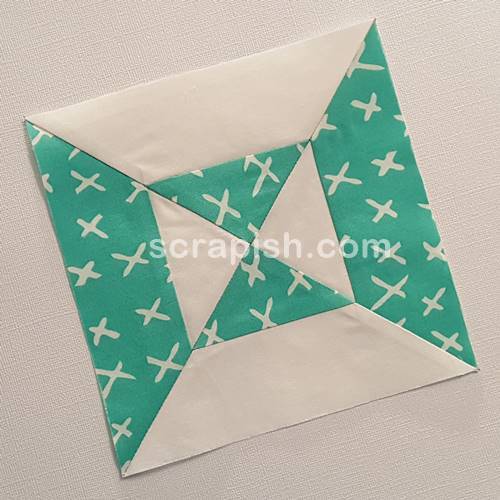
Your double hourglass quilt block is finished! Beautiful, I love it!
Double Hourglass Quilt
Here's what a quilt would look like with all double hourglass quilt blocks made in two contrasting colors – red and aqua. The binding is done in a darker shade of aqua.
I'm in love with this pattern!
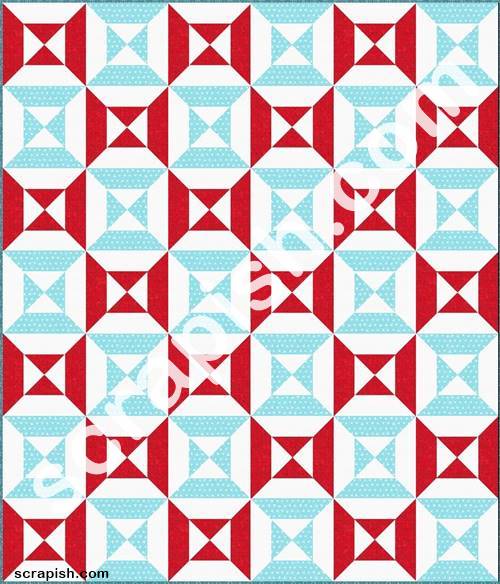
The simple hourglass quilt block and hourglass quilt pattern are similar. Check them out!
Subscribe to the Quilt Blocks Digest newsletter for updates, special offers & exclusive content!
You will receive an email asking you to confirm your consent to subscribe. You must click on the confirmation link contained in that email in order to be subscribed and receive emails.
Your email address is never shared. Unsubscribe any time.
