Subscribe to the Quilt Blocks Digest newsletter for updates, special offers & exclusive content!
- Home
- Other Quilt Blocks
- Hourglass
Easy Hourglass Quilt Block Tutorial
An hourglass quilt block is easy to make. Use half square triangles! Get the math chart and see how to square up this quilt block. Great for beginners!

The hourglass block is really quarter square triangles (four triangles in one square). These triangles are a basic unit of many quilt blocks, or may be used on their own as the entire block.
Usually, when two different fabrics are used to make quarter square triangles (QSTs), the unit is called an hourglass block.
You can get really creative with the fabrics that you use in order to create different effects.
Create a really dramatic looking block like the one shown above by using two contrasting fabrics. Make the effect more subtle by using shades of the same color fabric.
Hourglass Block Math
The math for an hourglass block is to add 1 1/4 inches to the finished size of the hourglass unit/block. Make the block and then trim up the edges, cutting off the dog ears.
Starting Squares = Hourglass Block Finished Size + 1 1/4 inches
Adding 1 1/4 inches results and very little fabric waste. However, your stitching needs to be needs to be spot on with a very accurate 1/4 inch seam, which leaves little bit of room for error.
Beginning quilters may want to add 1 1/2 inches to the finished hourglass unit/block size.
Hourglass Quilt Block Chart
Here's a chart that includes common sizes for an hourglass block. The math has been done for you!

In the chart above, to get a Finished Size (A) hourglass unit, simply start with 2 squares either 1 1/4 (B) or 1 1/2 (C) inches larger than that and make your units.
Then, trim them to their Unfinished Size (D) by squaring them up using the corresponding Ruler Measurement Lines (E).
Prerequisites
- Review the lesson on how to make half square triangles.
Lesson 1: Hourglass Tutorial
- All seams are 1/4 inch unless otherwise noted.
- Fabric A (print)
- Fabric B (solid)
Step 1 Cut Squares and Make HSTs Use the math chart above to determine the size of your starting squares and cut 1 square from Fabrics A and B.
First make your half square triangles (HSTs) using one square each of Fabric A and B.
(1a) Place one Fabric A square right side up and place one Fabric B square right side down on top of it. Use a pencil to draw a diagonal line from one corner to corner on the wrong side of the Fabric B square.
(1b) Stitch a 1/4 inch seam away from both sides of the marked line.
(1c) Using a rotary cutter, cut the squares apart on the marked diagonal line, making 2 HSTs.

(1d) Open the 2 HSTs with fabrics right side up and press the seams toward the darker fabric.

Step 2 With right sides together, align one of the half square triangles on top of the other.
Make sure that like fabrics are opposite one another and nest the seams (see how the folded back fabric reveals this).
On the top HST, from corner to corner, draw a diagonal line that is perpendicular to the seam.

Step 3 Stitch a 1/4 inch seam away from both sides of the marked line.

Step 4 Using a rotary cutter, cut the squares apart on the marked diagonal line, making 2 hourglass quilt blocks.

Step 5 Open each hourglass quilt block with fabrics right side up and press the seam open, or to either side.

How To Square Up Hourglass Blocks
Let's take a moment to look at one of our untrimmed hourglass blocks.
If you added 1 1/4 inch to your finished size unit you will not have much fabric to trim off. Your unit is pretty close to its unfinished size.
I needed a 3 inch finished unit so I started with 2 (4 1/4 inch) squares. You can see in the picture below that my hourglass block only needs a tiny bit of trimming to give me an unfinished size of 3 1/2 inches.

Note: If you started with squares that are 1 1/2 inches larger than your finished size units then you will have more excess fabric to trim.
Step 6 When you trim up an hourglass block you want to do it from the center of the block where all four triangles meet.
On the first cut you do not want to align the block only with the 3 1/2 inch measurement marks on the ruler.
Instead, divide the unfinished hourglass unit size in half (see Column E in the Hourglass Quilt Block Math Chart above where this math has been done for you. You're welcome! :-)).
In this case, that measurement is 1 3/4 inches.
Find the vertical and horizontal lines on the ruler that correspond to this measurement and align them with the center of the block where all four triangles meet (see where the drawn blue lines meet).
Using a rotary cutter, trim the unit along the right and top edges.

Step 7 Rotate the unit 180 degrees and now you can align the bottom and left edges along the measurement lines that correspond to your unfinished unit size. In this case that measurement is 3 1/2 inches.
The center of your block unit should align with the measurement lines
that are half of its unfinished size. In this case, that measurement is 1 3/4 inches.
But, to be sure your block is centered before trimming, simply align the center of the block (where all four triangles meet) with the measurement lines that are half its unfinished size (see the 1 3/4 inch measurement lines where the drawn blue lines meet).
Use a rotary cutter to trim the unit along the right and top edges.

Step 8 Trim any remaining hourglass quilt blocks.

Hourglass Blocks
See, hourglass quilt blocks look complex and maybe hard to make, but actually are very easy!
The result is just wonderful, I love hourglass blocks. The blocks on the second row were made using four different fabrics.
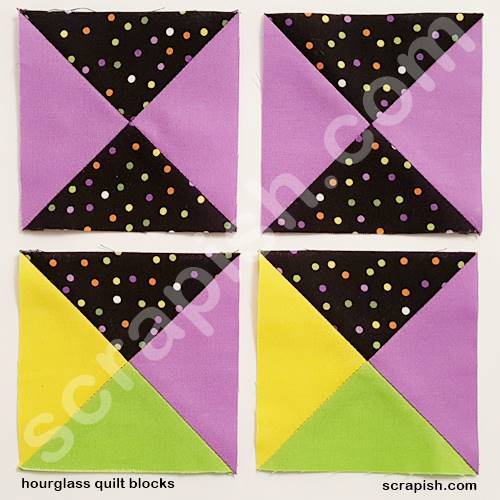
I made these from 10 inch and 5 inch charms.

This concludes Lesson 1: Hourglass Quilt Block.
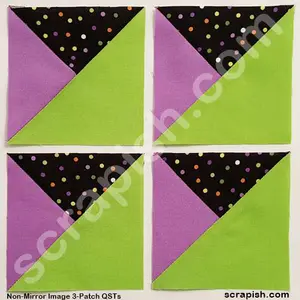
At the beginning I told you that hourglass blocks are just a special form of quarter square triangles. Learn how to make two more varieties of quarter square triangles (QSTs): Lesson 2: Mirror Image Split QSTs and Lesson 3: Non-Mirror Image 3 Patch QSTs.
Try this easy hourglass quilt pattern. Or, the double hourglass quilt block.
You might like these
3 Patch Quarter Square Triangle Tutorial - Use Formula or Chart
The 3 patch quarter square triangle is easy to make using half square triangles. Get the formula, size chart and see a video!
Ohio Star Quilt Block Made Easy and Fast, Even for Beginners
Ohio star quilt block directions using a quarter square triangle ruler. No lines to mark and very little trimming makes making a quilt faster.
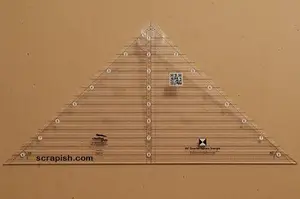
How To Use A Quarter Square Triangle Ruler Tutorial
Find out how to use a quarter square triangle ruler and make quarter square triangles faster out of strips. See examples of quarter square triangles.

Subscribe to the Quilt Blocks Digest newsletter for updates, special offers & exclusive content!
You will receive an email asking you to confirm your consent to subscribe. You must click on the confirmation link contained in that email in order to be subscribed and receive emails.
Your email address is never shared. Unsubscribe any time.
Recent Tutorials
-
Double Friendship Star Quilt Block Tutorial
Apr 05, 26 10:35 PM
 The double friendship star quilt block is easy to make. See step-by-step how and get fabric requirements for five sizes including 12 inch and bigger!
 -
Courthouse Steps Quilt Block Pattern Tutorial
Oct 23, 22 02:11 PM
See step-by-step how a courthouse steps quilt block pattern is stitched. It's a great companion block to use with star quilt blocks. -
Churn Dash Quilt Block Pattern Tutorial - 6 Inch, 9 Inch and 12 Inch
Jul 18, 22 07:11 PM
The churn dash quilt block looks difficult but is easy to piece. See step-by-step instructions with pictures. Get yardage for 3 sizes!


